Category: Uncategorized

  • Why Roof Leaks Start and What to Do Next

    Why Roof Leaks Start and What to Do Next

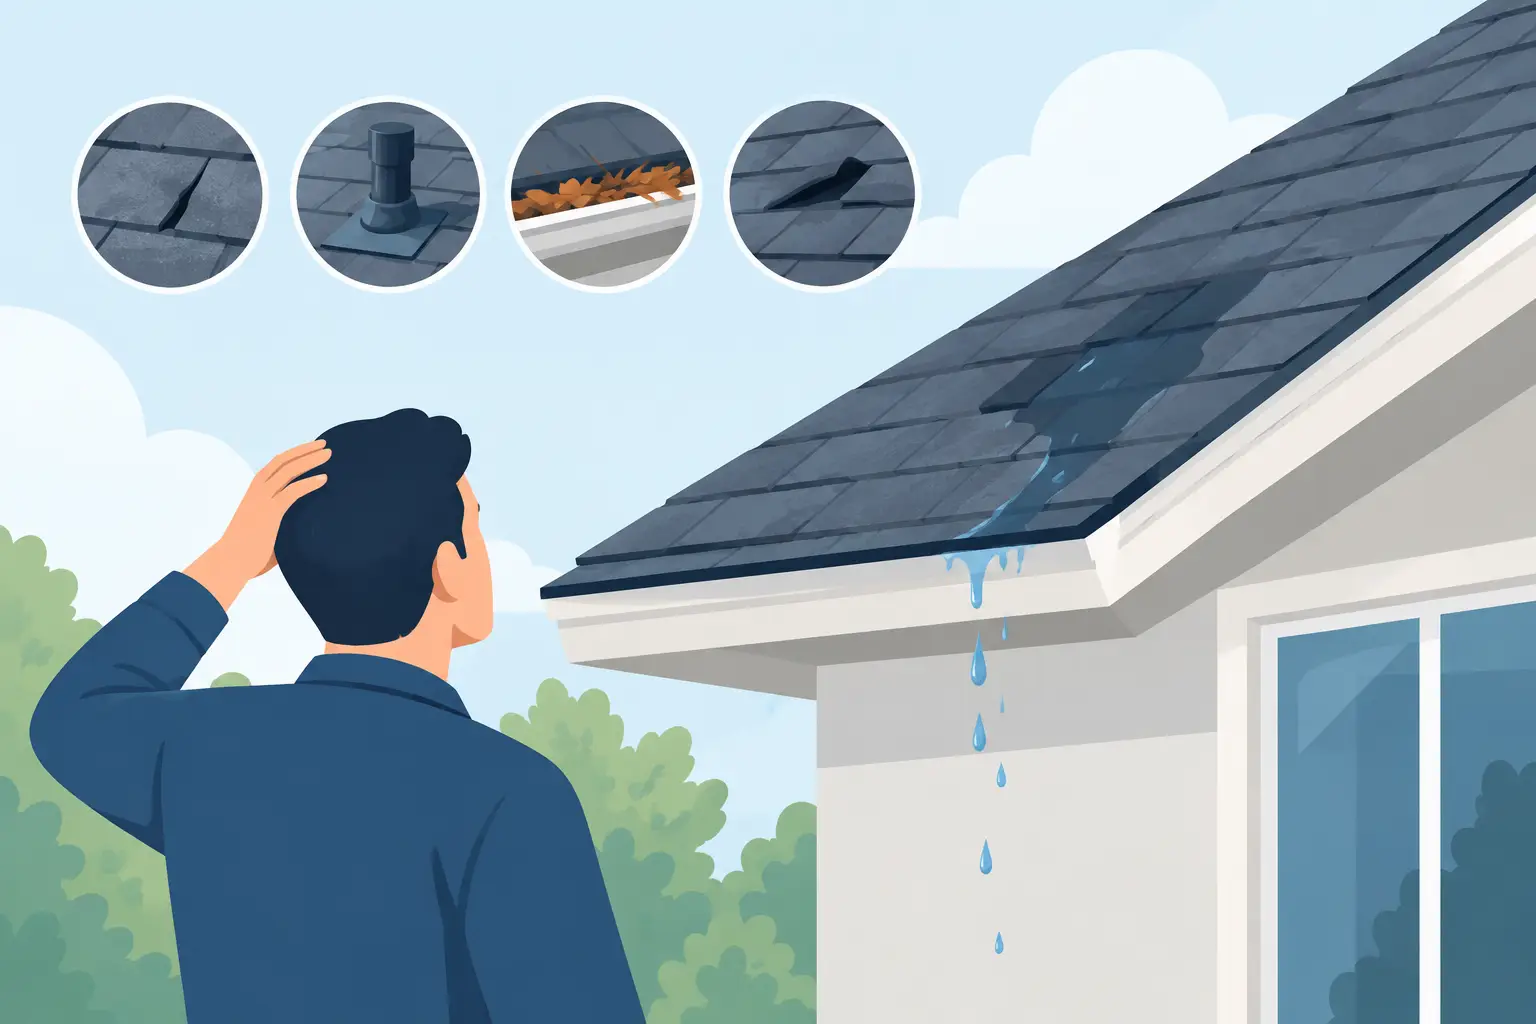
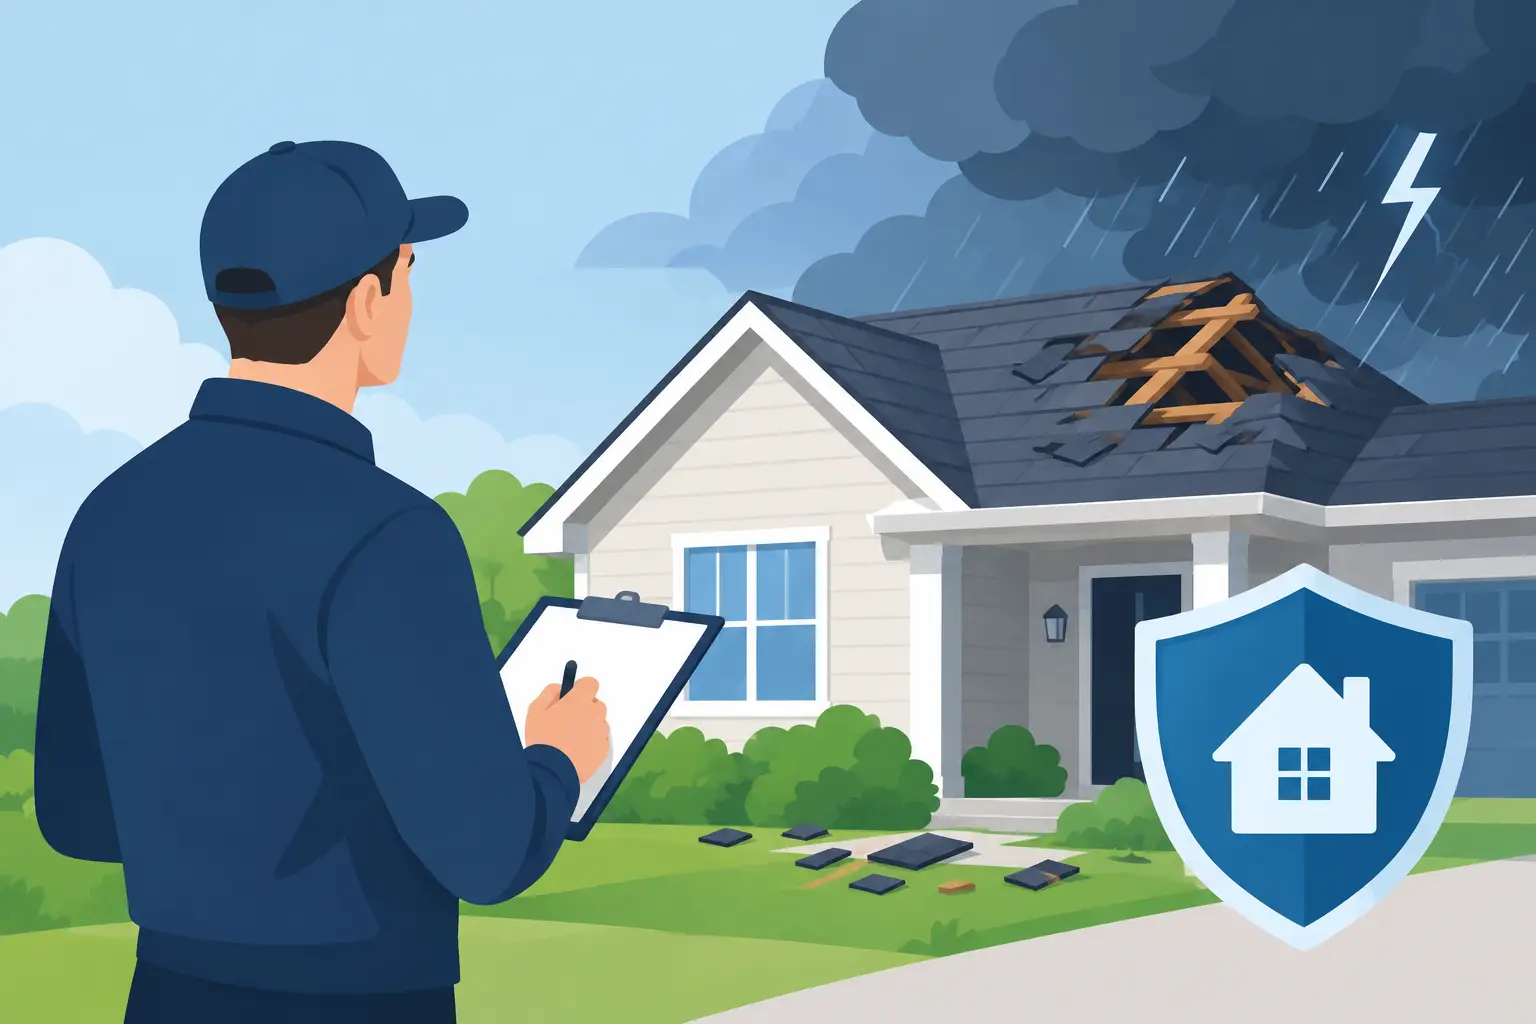
    A brown spot on the ceiling may show up days after a hard Coastal Georgia rain, but the water that caused it may have entered the roof somewhere else entirely. That is one reason why roof leaks can be frustrating for homeowners: the visible stain is often a symptom, not the source. Finding the cause early matters because a small opening can allow moisture to damage insulation, framing, ceilings, and interior finishes long before it becomes a major drip.

    Why Roof Leaks Are Not Always Easy to Trace

    Water does not always travel straight down. Once it gets beneath shingles, metal panels, flashing, or underlayment, it can follow roof decking, rafters, pipes, wiring, or insulation before appearing inside your home. The ceiling stain over the guest room may be several feet away from the actual roof problem.

    Wind-driven rain adds another layer of difficulty. In Savannah, Pooler, and throughout the Lowcountry, storms can push rain sideways and upward under roofing components that normally shed water without trouble. A roof may look fine after a light shower but leak during a strong storm from one particular direction.

    That is why a careful inspection should look beyond the wet spot. The goal is to identify how water entered, what materials were affected, and whether the condition is isolated or part of a larger aging or storm-related issue.

    The Most Common Reasons a Roof Starts Leaking

    Damaged or missing shingles

    Shingles are your roof’s first line of defense, but they take the full force of sun, rain, wind, and debris. High winds can lift a shingle edge, break the seal that holds it down, or remove shingles altogether. Even if a shingle remains in place, a crease or torn corner can create a path for water.

    Older shingles can also become brittle, curl at the edges, or lose protective granules. Granule loss alone does not always mean a roof is leaking, but it can signal that the roof is nearing a point where repairs and maintenance deserve closer attention.

    Failed flashing around vulnerable areas

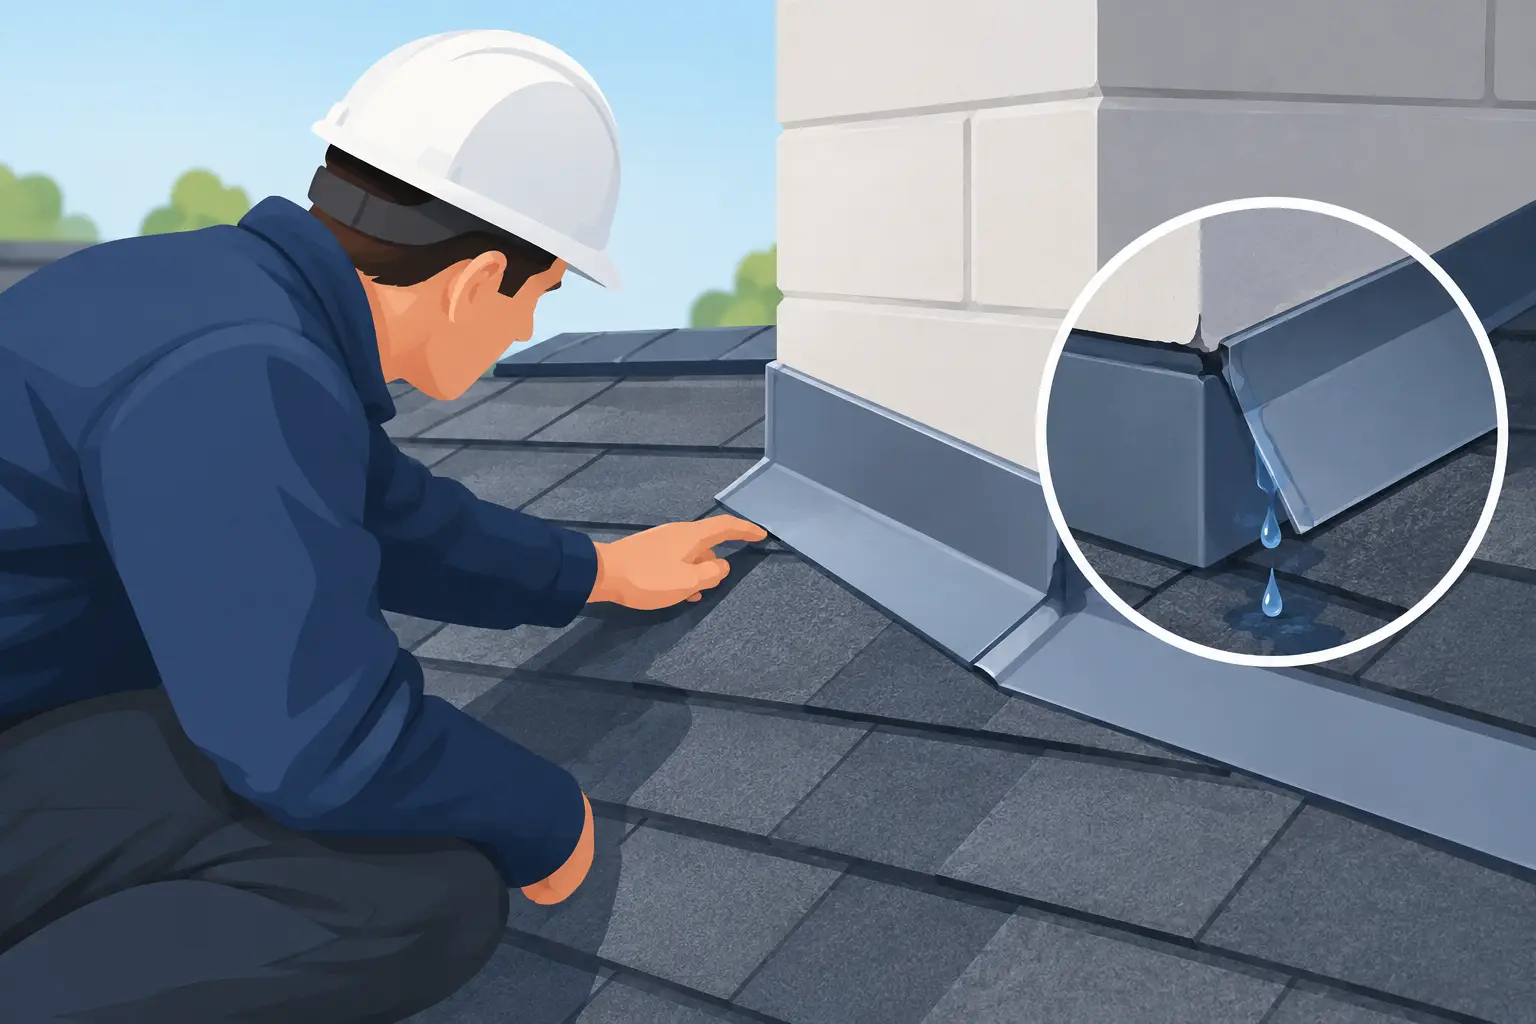
    Flashing is the metal material installed where the roof meets a wall, chimney, vent, skylight, or valley. These transitions are naturally more vulnerable because water is being directed around an interruption in the roof surface.

    A flashing leak may come from loose fasteners, cracked sealant, rust, improper installation, or storm damage. It is common for homeowners to suspect the entire roof when the problem is actually one damaged flashing detail. It is also possible for a small flashing failure to cause substantial interior damage if it goes unnoticed.

    Worn pipe boots and roof penetrations

    Plumbing vent pipes pass through the roof, and the rubber or metal boots around them are designed to keep water out. Over time, sunlight can dry and crack rubber collars. A boot can split, pull away from the pipe, or fail around its fasteners.

    These leaks are often relatively contained when found early, but they should not be ignored. Water entering near a vent pipe can soak surrounding decking and insulation before it reaches the ceiling below.

    Clogged or damaged gutters

    Gutters are not part of the roof covering, but they play an important role in protecting the roof edge, fascia, and foundation. When leaves, pine straw, or roof granules clog a gutter, water can back up beneath shingles at the eaves. Overflow can also rot trim and create staining along exterior walls.

    A gutter issue is especially likely when leaks or water stains appear near the roofline after heavy rain. Keeping gutters clear and securely attached is a practical part of roof maintenance, particularly on homes surrounded by trees.

    Valley problems and debris buildup

    A roof valley is where two roof slopes meet. It carries a large volume of water, so it needs to be installed correctly and kept clear. Leaves and branches can collect in valleys, slowing drainage and holding moisture against roofing materials.

    Valley leaks can result from debris, cracked shingles, exposed fasteners, damaged underlayment, or improperly sealed transitions. Because water naturally concentrates there, a small defect can become noticeable quickly during a downpour.

    Storm damage that is easy to miss from the ground

    Not all storm damage is obvious. You may not see a missing shingle from the driveway, yet wind may have lifted shingles enough to break their seals. Hail can bruise or fracture roofing materials. Fallen limbs can puncture shingles, dent metal, or damage flashing.

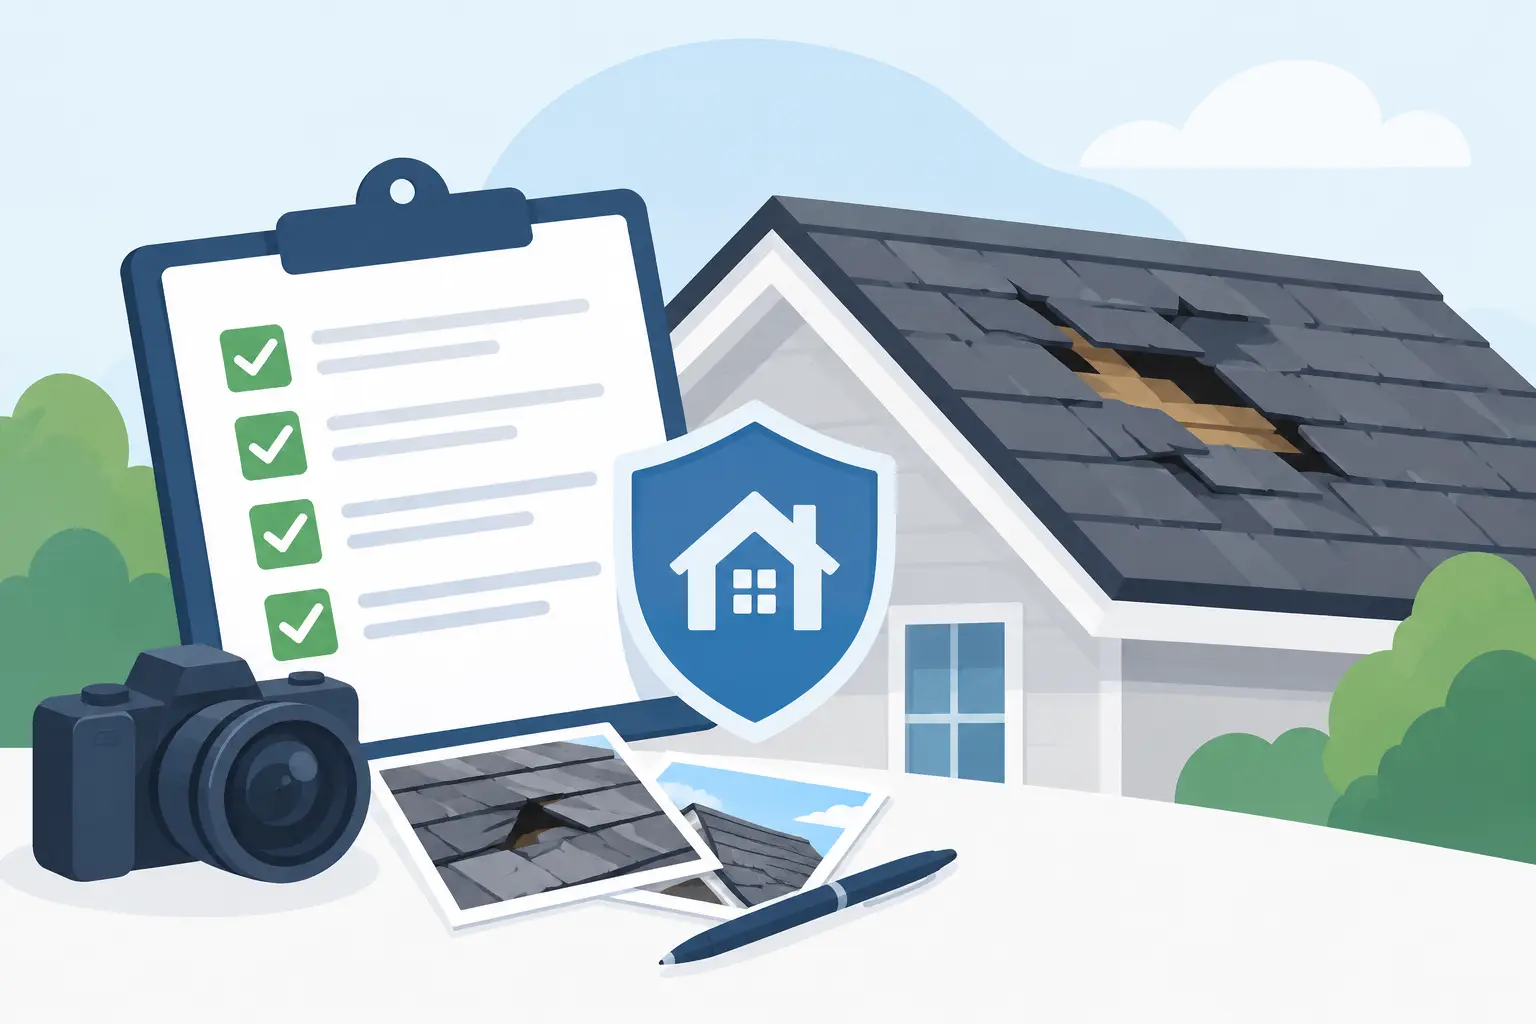
    After a severe storm, a professional inspection can help separate ordinary wear from active damage. Dated photos, measurements, and a written estimate give property owners a clear record of what was found and what repairs may be needed.

    Aging materials and past repair issues

    Every roof has a service life, and repairs made years ago may not perform forever. Sealants dry out, fasteners loosen, and materials expand and contract through changing temperatures. In some cases, the roof itself is sound but an old repair around a vent, wall, or skylight has reached the end of its useful life.

    Age does not automatically mean replacement. A targeted repair may be the right answer when the damage is limited and the overall roof remains in good condition. If leaks are occurring in several areas or the roofing system is broadly worn, replacement may offer better long-term protection than repeated spot repairs.

    What to Do When You Notice a Leak

    Start by protecting the inside of your home. Move furniture, electronics, and valuables away from the affected area. If water is actively dripping, place a container underneath it and check the surrounding ceiling for bulging drywall. A sagging, water-filled ceiling can become a safety concern, so keep people out of the area and seek professional help promptly.

    If it is safe to do so, take photos of the interior stain, dripping water, or damaged belongings. Note when the leak occurs: only during wind-driven rain, after prolonged rainfall, or even when the weather is dry. Those details can help narrow down the cause.

    Avoid climbing onto a wet roof or attempting a quick patch during a storm. Wet shingles, steep slopes, loose debris, and hidden damage make roof work dangerous. A tarp may be appropriate in an emergency when installed safely by a qualified professional, but a tarp is temporary protection, not a repair.

    Why Fast Attention Matters

    A roof leak rarely improves on its own. Water can dampen insulation, encourage mold growth, stain ceilings, weaken wood decking, and damage electrical systems. The longer moisture remains trapped in the roof assembly, the more extensive the repair can become.

    Prompt attention does not always mean the roof needs to be replaced immediately. It means getting a clear answer before a manageable problem spreads. An experienced inspector can evaluate shingles, flashing, vents, valleys, gutters, attic conditions, and storm-related concerns to recommend the appropriate next step.

    For hard-to-reach areas, drone inspections can provide a closer view without unnecessary foot traffic on the roof. That can be useful after storms or when a roof’s slope makes visual inspection from the ground unreliable. A hands-on evaluation may still be needed, but quality photos help homeowners understand what is happening above their heads.

    Preventing the Next Roof Leak

    The best prevention is regular attention before water reaches the ceiling. Keep gutters and valleys clear, trim limbs that rub against the roof, and look for shingles in the yard after high winds. From the ground, watch for lifted shingles, sagging rooflines, damaged flashing, or stains beneath roof edges.

    An annual roof inspection is a sensible habit for many homes, especially those with mature trees, older roofing materials, or recent storm exposure. It is also wise to schedule an inspection after a major weather event, even when there is no immediate leak. Catching a loose shingle or cracked pipe boot early is far easier than repairing wet decking and drywall later.

    At Real Good Roofing, we believe homeowners deserve straightforward answers about what their roof needs and what can wait. Whether the solution is a focused repair, preventive maintenance, or a replacement plan, the right first step is identifying the true source of the water. A dry ceiling is reassuring, but a properly protected roof is what helps keep it that way.
  • A Roof Maintenance Plan That Prevents Leaks

    A Roof Maintenance Plan That Prevents Leaks

    A roof rarely fails all at once. More often, a loose shingle, backed-up gutter, cracked pipe boot, or worn flashing lets in a little water at a time. In Coastal Georgia and the Lowcountry, intense sun, heavy rain, wind, salt air, and hurricane-season storms can speed up that process. A practical roof maintenance plan gives homeowners a way to spot trouble while it is still manageable.

    The goal is not to climb onto your roof every weekend or turn homeownership into a full-time job. It is to establish a sensible routine, know what deserves attention, and bring in a qualified roofer before a minor defect becomes ceiling damage, mold, or a larger repair.

    Why a Roof Maintenance Plan Pays Off

    Your roof is a system, not just a layer of shingles or metal panels. It includes flashing around chimneys and walls, vent boots, valleys, underlayment, gutters, fasteners, attic ventilation, and the edges where water is directed away from the home. A problem in any one of those areas can affect the rest.

    Routine maintenance helps you catch visible wear before water reaches the roof deck or attic. That can preserve interior finishes, protect framing, and help you make repair decisions based on the actual condition of the roof rather than an emergency. It also creates a useful record of when inspections, cleanings, and repairs were completed.

    There is a practical trade-off here. A newer roof in good condition may only need professional attention once a year plus a post-storm check. An older roof, a roof under heavy tree cover, or a commercial property with penetrations and drainage components may need more frequent monitoring. The right schedule depends on the roof material, age, surrounding trees, and weather exposure.

    Build Your Roof Maintenance Plan Around the Seasons

    Coastal weather does not always follow a neat calendar, but seasonal check-ins make it easier to stay ahead of common problems. Put reminders on the calendar rather than waiting until you notice a stain or drip.

    Start with a professional inspection

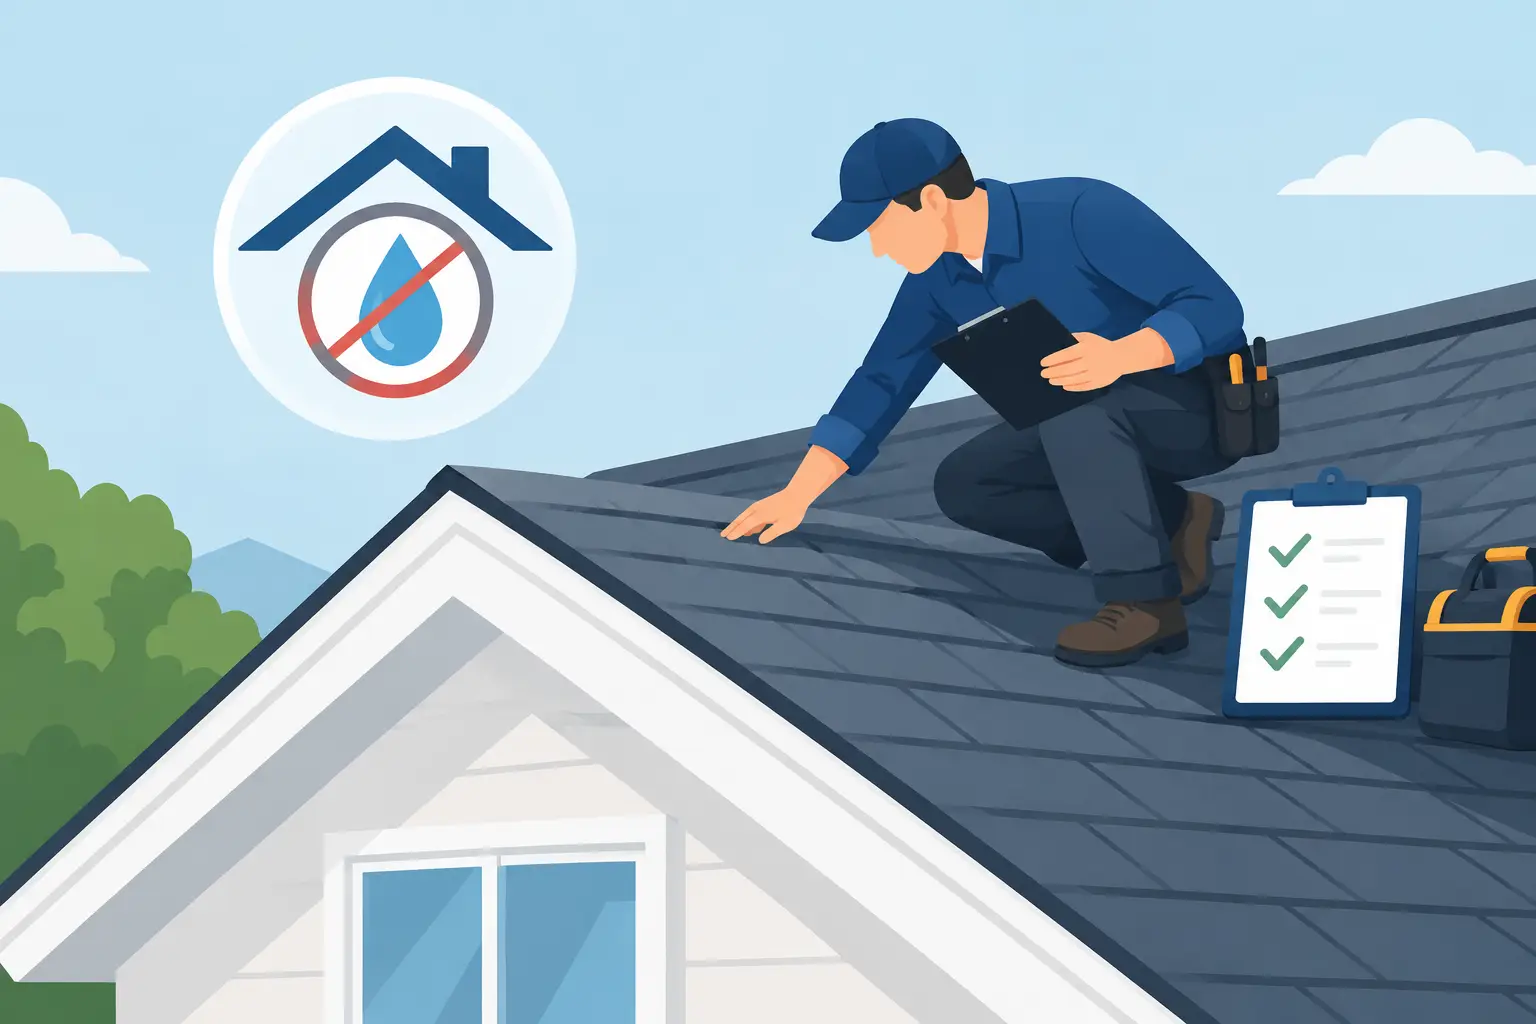
    A professional roof inspection is the foundation of the plan. For most homes, an annual inspection is a good baseline. Schedule one sooner if your roof is aging, you have had recurring leaks, or a strong storm has passed through the area.

    A trained inspector can safely evaluate conditions that are easy to miss from the ground, including lifted shingles, exposed fasteners, failing sealant, soft spots, flashing gaps, and damage around vents. Drone inspections can also provide a clear view of steep, high, or hard-to-reach roof sections without unnecessary foot traffic on the roof.

    Ask for clear findings and photos. You should understand what is urgent, what can be monitored, and what repair options make sense. Honest maintenance is not about selling work that is not needed. It is about identifying the items that could allow water in and addressing them at the right time.

    Keep gutters and drainage moving

    Gutters are often treated as a separate issue, but they are part of roof protection. When leaves, pine straw, shingle granules, or nesting debris block a gutter or downspout, water can overflow onto fascia boards, siding, landscaping, and the foundation. Standing water near the roof edge also puts extra stress on the lower courses of roofing.

    Clean gutters at least twice each year and more often if mature trees hang over the home. After a hard rain, take a few minutes to watch how water moves. Overflowing water, sagging sections, drips behind the gutter, or downspouts that discharge too close to the house should be corrected.

    Check from the ground after storms

    After high winds or heavy rain, walk around the property when it is safe to do so. You are not trying to diagnose every roof issue. You are looking for changes: shingles or metal pieces on the ground, branches on the roof, loose gutter sections, bent flashing, damaged soffit, or debris piled in valleys.

    Also look inside. A new ceiling stain, bubbling paint, damp insulation, musty odor, or a change in attic humidity can point to water intrusion. Do not assume a stain is old simply because it is dry when you find it. Mark the area, take a photo, and arrange an inspection if it is new or growing.

    Manage trees without damaging the roof

    Trees provide welcome shade, but branches rubbing against roofing can wear away protective granules, scratch metal, and trap moisture and debris. Limbs that hang directly over the roof can also become a storm hazard.

    Have overhanging limbs trimmed by a qualified tree professional. Avoid letting anyone use the roof as a work platform or drag cut branches across its surface. If moss, algae, or staining appears, ask a roofing professional about the appropriate cleaning method for your roof material. Pressure washing can damage many shingle roofs and is not a safe default solution.

    What to Watch for Between Inspections

    Homeowners do not need to become roofing experts, but a few warning signs should move a roof concern higher on the priority list. Missing, cracked, curled, or lifted shingles deserve attention, especially after wind. On metal roofing, look for loose panels, displaced fasteners, deteriorated sealant, or rust around penetrations and edges.

    Pay close attention to transition areas. Roof leaks frequently begin where materials meet: around chimneys, skylights, vents, wall intersections, valleys, and plumbing pipes. A roof can look generally sound from the street while a small flashing failure allows water behind the surface.

    Granules in gutters are another clue, though a small amount is common, especially after a new roof is installed. Heavy or sudden granule loss, bald-looking shingle patches, or dark areas that appear different from surrounding shingles call for an inspection. On flat or low-slope commercial roofs, ponding water, open seams, blistering, and clogged drains should be evaluated promptly.

    Attic Conditions Matter, Too

    The underside of the roof tells part of the story. If you can safely access your attic, check it periodically during daylight hours. Look for daylight coming through roof penetrations, damp decking, dark water trails, wet insulation, or mildew. Be careful not to step between joists or disturb electrical wiring.

    Ventilation matters because trapped heat and moisture can shorten the life of roofing materials and contribute to condensation. In summer, Coastal Georgia attics can become extremely hot. A roofing professional can assess whether intake and exhaust ventilation appear balanced and whether the roof system is showing signs of moisture-related stress.

    Not every attic issue means the roof needs replacement. Sometimes the answer is a targeted repair, a vent adjustment, or correction of a bathroom fan that exhausts into the attic. The value of an inspection is separating the real source of the problem from the symptom you can see.

    Know When Maintenance Becomes Repair

    A good plan includes a clear line between routine upkeep and work that should not wait. Call for professional help after active leaking, visible storm damage, a fallen limb, sagging roof areas, loose flashing, or a sudden increase in ceiling stains. Temporary buckets and towels can protect the room, but they do not stop the source of the water.

    Avoid climbing onto a wet, steep, or storm-damaged roof. It is risky, and walking in the wrong place can cause additional damage. Take photos from the ground if you can do so safely, move valuables away from the leak, and contact a roofing contractor for an assessment.

    For homeowners in Pooler, Savannah, and nearby coastal communities, Real Good Roofing can provide a thorough roof inspection, clear photo documentation, measurements, and a written estimate for recommended repairs. That straightforward information helps you understand your roof’s condition and choose the next step with confidence.

    A Simple Maintenance Calendar

    Keep your plan realistic. A four-part annual routine is enough for many properties:

    • In spring, inspect gutters, trim back problem limbs, and schedule a professional roof check if winter storms or pollen season exposed concerns.
    • Before hurricane season, clear drainage paths, secure loose exterior components, and address any known roof or flashing repairs.
    • After major storms, inspect the property from the ground and check ceilings and attic areas for new signs of water.
    • In late fall, remove leaves and pine straw from gutters and valleys, then confirm downspouts are carrying water away from the building.

    Keep notes with the date, photos, and any work completed. That record makes it easier to notice a recurring issue, budget for future work, and communicate clearly with a roofer when something changes.

    A roof maintenance plan works best when it becomes an ordinary part of caring for the property, like servicing an HVAC system or cleaning gutters. Give small concerns attention early, and your roof has a better chance to do its quiet, essential job through the next hard rain.

  • Insurance Roofing Claim Guide for Storm Damage

    Insurance Roofing Claim Guide for Storm Damage

    A hard Coastal Georgia storm can leave a roof looking mostly normal from the ground while wind-lifted shingles, punctures, and damaged flashing create a path for water. This insurance roofing claim guide gives homeowners a practical way to respond: protect the property, document what happened, understand the condition of the roof, and communicate directly with their insurer using clear information.

    The goal is not to assume a claim will be approved. Every policy, loss, and property condition is different. The goal is to make decisions based on facts before a small roof problem becomes stained ceilings, wet insulation, wood rot, or a more extensive repair.

    What to Do First After Roof Storm Damage

    Safety comes before documentation. Stay off the roof, avoid downed power lines, and do not climb a ladder in wet or windy conditions. If water is entering the home, move furniture and valuables away from the affected area, place containers beneath active drips, and take reasonable steps to limit additional interior damage.

    Start a simple record while the details are fresh. Note the date and approximate time of the storm, what you observed, and when you first noticed any leak or damage. Take wide photos of the home from the ground, then closer photos of visible debris, fallen limbs, bent gutters, damaged siding, or water marks indoors. Video can also help show active dripping or the scope of debris around the property.

    Keep receipts for reasonable temporary protection measures and retain damaged materials if it is safe and practical to do so. Avoid throwing away a broken shingle, vent cap, or piece of flashing before it has been photographed. At the same time, do not delay necessary emergency action just to preserve a damaged item.

    Watch for Damage That Is Easy to Miss

    Storm damage is not always a missing-shingle problem. Wind can loosen tabs without tearing them completely away. Hail can bruise shingles or damage metal components. Wind-driven rain may enter at flashing around chimneys, walls, skylights, vents, or pipe boots. A leak can also travel along framing before it appears on a ceiling, so the visible water spot may not sit directly below the roof opening.

    Inside the home, look for new ceiling discoloration, bubbling paint, damp drywall, musty odors, or drips in the attic. Outside, look for granules collecting near downspouts, new exposed areas on the roof, lifted edges, cracked seals, and damage to gutters or fascia. These signs do not determine coverage, but they are useful details to record and investigate.

    Insurance Roofing Claim Guide: Get Clear Documentation

    A professional roof inspection can help separate visible storm-related concerns from ordinary aging, installation issues, and maintenance needs. That distinction matters because a roof can have more than one condition at the same time. A storm may cause a new opening, for example, while an older pipe boot or worn seal also needs attention.

    Ask for documentation you can review and keep with your property records. Useful materials often include dated photographs, roof measurements, notes identifying observed conditions, and a written estimate for recommended repair or replacement work. Read the estimate carefully so you understand what work is proposed, what materials are involved, and whether the recommendation is a localized repair or a full replacement.

    Real Good Roofing provides inspections, dated photos, measurements, and written estimates that homeowners can submit with their own insurance claims. A qualified local inspection is especially valuable when the damage is difficult to see from the ground or when a recent storm has left you unsure whether the roof needs immediate work.

    Drone photography can provide a safer, broader view of roof slopes, ridge lines, valleys, and hard-to-reach areas. It is helpful documentation, but it does not replace a close professional evaluation where one is appropriate. The best assessment matches the inspection method to the roof’s height, pitch, material, access, and visible condition.

    Contact Your Insurer With the Facts

    When you are ready, contact your insurance company or agent yourself and report the loss according to your policy instructions. Have your policy information, storm date, photos, notes, and inspection materials available. Describe what you observed plainly: when the storm occurred, what changed afterward, where water entered if there is an active leak, and what temporary steps you took to protect the home.

    Ask questions and write down the answers. It is reasonable to ask what information is needed, what the next steps are, whether there are deadlines, and how to provide documents. Keep a file with emails, claim-related letters, photos, estimates, inspection notes, and a log of calls that includes the date, time, and name of the person you spoke with.

    Do not guess about the cause of damage if you do not know. Share the facts you have, along with the documentation. Your insurer makes its own coverage determination under the terms of your policy. A roofing contractor can evaluate roof conditions and provide repair recommendations, but cannot make that coverage decision or negotiate a claim for you.

    Be Careful With Broad Promises

    After a major storm, homeowners may receive unsolicited offers that sound quick and reassuring. Be cautious of anyone who promises a certain insurance outcome, pressures you to sign immediately, or discourages you from reading paperwork. A roof is one of the home’s most important protective systems. The contractor you choose should be willing to explain the observed damage, scope of work, materials, schedule, and warranty in straightforward terms.

    Local experience also matters. Coastal roofs face intense sun, heavy rain, humidity, high winds, and salt air in some areas. Repair details that protect flashing, penetrations, ventilation, and drainage deserve as much attention as the shingles or metal panels you see from the street.

    Repair or Replacement: How to Think Through the Decision

    An insurance-related inspection does not automatically mean the roof needs to be replaced. A targeted repair may be the sensible answer when damage is isolated and the surrounding roof remains in good condition. Replacing damaged flashing, repairing a small puncture, or correcting a limited area of wind damage can restore protection without unnecessary work.

    A replacement may be worth considering when damage is widespread, when multiple roof areas have failed, when matching materials are not reasonably available, or when the roof has reached the end of its serviceable life. The right recommendation depends on the full roof system, not one photograph or one loose shingle.

    For commercial properties and multifamily buildings, the decision can involve additional concerns such as tenant disruption, drainage, rooftop equipment, and long-term maintenance planning. Property managers should document tenant reports promptly and inspect interior spaces as well as the roof surface. A minor leak above a ceiling grid can still affect insulation, wiring, finishes, and daily operations.

    Common Mistakes That Make a Roof Problem Worse

    The first mistake is waiting for visible interior damage. Water can move beneath roofing materials and through attic spaces before it reaches a living area. Calling for an inspection after a significant storm, especially when neighbors have visible damage or debris is widespread, can catch problems earlier.

    The second is treating all roof damage as obvious. A roof may have subtle wind creasing, compromised seals, or flashing movement that needs trained eyes to identify. The third is approving work without a clear written scope. You should know what will be repaired or replaced, how the work area will be protected, and what cleanup to expect when the job is complete.

    Finally, do not let an insurance question postpone needed emergency protection. If the roof is actively leaking, prompt temporary measures and professional repair planning can help prevent the damage from spreading. Documentation is valuable, but protecting the home is the immediate priority.

    A storm is stressful enough without wondering what is happening above your ceiling. Take clear photos, get a thorough inspection, keep your records organized, and make roof decisions based on the actual condition of your property. That steady approach gives you a stronger foundation for protecting your home long after the weather clears.

  • Roof Repair Versus Replacement Explained

    Roof Repair Versus Replacement Explained

    A stain spreading across the ceiling after a Coastal Georgia downpour can make any homeowner fear the worst. But roof repair versus replacement is rarely a decision that should be made from inside the house, or from a quick look at a few missing shingles. The right answer depends on what happened beneath the surface, how much of the roof is affected, how old the system is, and whether a repair will truly protect your home for years to come.

    A good roofing decision is not about choosing the smallest immediate bill or automatically assuming a full replacement is necessary. It is about stopping water intrusion, protecting the structure of the home, and putting your money toward the solution that makes sense for the roof you have.

    Roof Repair Versus Replacement Starts With the Facts

    A roof is a system, not just a layer of shingles. Shingles, flashing, underlayment, vents, roof decking, valleys, and penetrations around pipes or chimneys all have a role in keeping water out. A leak may begin at one small failure point, while the water it releases travels several feet before showing up as a ceiling stain.

    That is why an inspection matters before any recommendation. A trained roofer should look for the visible problem and investigate the surrounding areas for lifted shingles, cracked seals, damaged flashing, soft decking, granule loss, and signs of older repairs. Drone imagery can be useful for safely documenting steep or hard-to-see areas, while an on-roof inspection provides the close view needed to evaluate the condition of the materials.

    Storm damage deserves the same careful approach. Wind can break adhesive seals without tearing off a shingle. Hail can leave bruising that is difficult to identify from the ground. Branch impact may create a localized opening, but moisture can continue moving below the roof covering after the storm has passed. Clear photos, measurements, and a written assessment give a property owner a better foundation for deciding what comes next.

    When a Roof Repair Is the Better Call

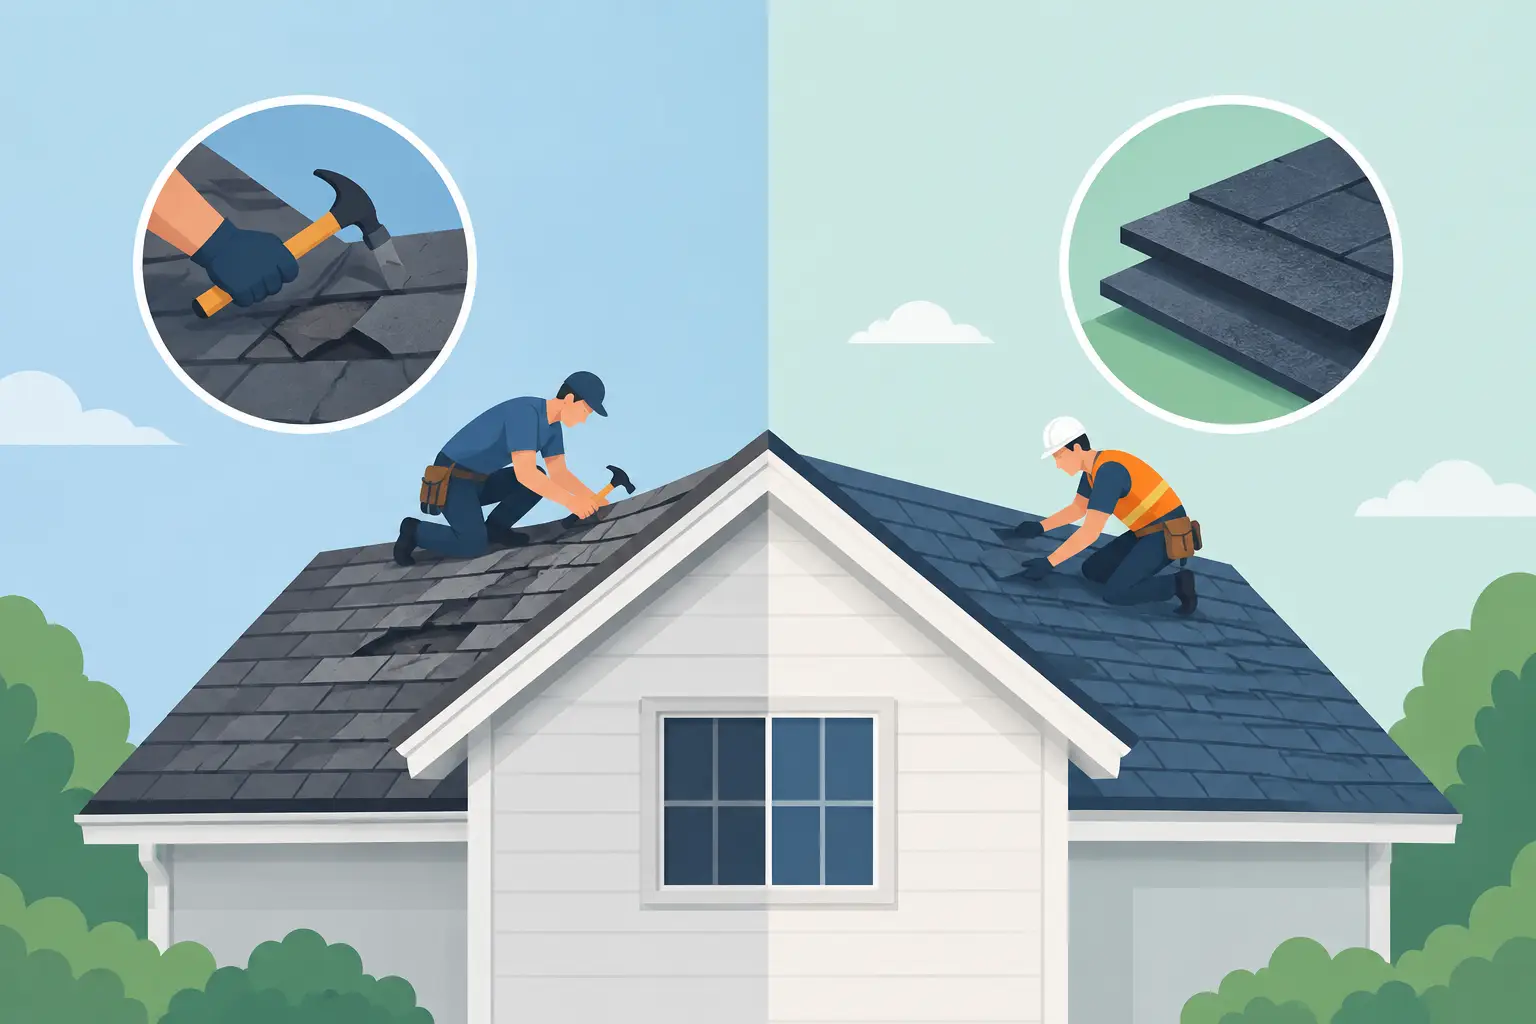
    Repair is often the right choice when the damage is limited and the rest of the roofing system remains in good condition. A few missing shingles after high winds, a leaking pipe boot, loose flashing near a wall, or a small puncture from a fallen limb may be resolved without replacing the entire roof.

    The age of the roof matters here. If the existing shingles still have sound granules, lie flat, and are not broadly brittle or cracked, a targeted repair can extend the service life of the system. A properly completed repair should address the cause of the leak, replace compromised materials, and restore the water-shedding details around the affected area.

    Repair can also be a sensible choice when a homeowner is addressing a maintenance issue early. Small gaps around flashings, debris-packed valleys, exposed fasteners, and damaged sealant are easier and less disruptive to correct before repeated water exposure causes decking or interior damage.

    There are limits. Matching a repair to older, weathered shingles is not always possible, especially when the original color is discontinued or the roof has faded unevenly. A professional should explain whether a repair will be visually noticeable and whether the surrounding materials are likely to need attention soon. Honest advice includes acknowledging when a repair is a practical short-term fix rather than a long-term answer.

    When Replacement Is the Safer Investment

    A roof replacement becomes the stronger choice when damage is widespread, the existing materials are near the end of their useful life, or repairs would only keep chasing problems from one area to another. Multiple leaks, large sections of wind damage, extensive granule loss, curling shingles, repeated patchwork, or soft roof decking can all point toward replacement.

    Replacement is also worth serious consideration when the roof has been repaired several times in recent years. One repair may be appropriate. A pattern of repairs can signal that the roof is no longer providing dependable protection. Continuing to patch an aging system may cost more over time while leaving the home exposed to sudden leaks during the next severe weather event.

    For homeowners planning to stay in the house, a new roof can provide a clean starting point. It allows damaged materials beneath the shingles to be addressed, improves the appearance of the property, and gives the owner a clearer understanding of the roof’s condition and expected maintenance needs. For property owners preparing to sell or managing a commercial building, replacement may also reduce the uncertainty that comes with an aging roof.

    Replacement is not automatically required simply because a roof is older. Some roofs age better than others based on material quality, installation, ventilation, tree coverage, storm exposure, and maintenance history. The condition of the roof should lead the recommendation, not the calendar alone.

    Four Factors That Should Guide the Decision

    The scope of the damage comes first. Localized damage on an otherwise sound roof usually favors repair. Damage spread across multiple slopes, valleys, or roof components may make replacement more practical and reliable.

    The condition of the underlying structure is equally important. If water has damaged decking, framing, insulation, or interior finishes, the project may need to go beyond replacing surface shingles. The goal is to correct the source of moisture and identify materials that can no longer perform safely.

    Next, consider the remaining life of the roof. A repair on a relatively new roof may preserve years of useful service. The same repair on a roof nearing the end of its lifespan may only delay a replacement that is already approaching. This is where a straightforward conversation about near-term and long-term costs matters most.

    Finally, think about your plans for the property. If you need reliable protection for the next decade or more, the best option may be different from the right option for a home you expect to sell soon. Neither priority is wrong. The key is making the decision with clear information instead of reacting only to the immediate leak.

    Watch for Problems That Need Prompt Attention

    Some warning signs should not wait for a convenient time on the calendar. Call for a professional inspection promptly if you notice active dripping, a ceiling bulge, shingles on the ground after a storm, daylight in the attic, sagging roof areas, or a tree limb that has struck the roof. Fast action can limit the spread of water damage and help protect the interior of the property.

    If it is safe to do so, move belongings away from the leak and place a container beneath dripping water. Do not climb onto a wet, steep, or storm-damaged roof. What looks like a simple missing shingle may involve slippery surfaces, hidden structural weakness, or electrical hazards.

    For properties in Pooler, Savannah, and surrounding coastal communities, storm readiness is part of roof ownership. Wind-driven rain can expose weaknesses that were not obvious during normal weather. A post-storm inspection can identify damage early, even when there is no immediate leak inside.

    What a Straightforward Recommendation Should Include

    A roofing contractor should be able to explain what was found, where it was found, and why repair or replacement is being recommended. Ask to see photos of the affected areas and request a written scope of work that identifies the materials and work involved. You should understand whether the recommendation addresses a localized failure, a broader roofing issue, or both.

    At Real Good Roofing, that practical approach is central to the job. A clear inspection, responsive communication, and transparent written estimate help homeowners make decisions without pressure or guesswork. With third-generation roofing experience and detailed inspection tools, the focus stays on the condition of the property and the repair that genuinely fits it.

    The best next step is simple: have the roof evaluated before a small concern becomes an expensive interior problem. Whether the answer is a focused repair or a full replacement, a clear assessment gives you the confidence to protect your home on solid information.

  • Wind Damage Roof Repair: What to Do First

    Wind Damage Roof Repair: What to Do First

    A hard Coastal Georgia storm can leave a roof looking normal from the driveway while wind has already lifted shingles, loosened flashing, or opened a path for water. Wind damage roof repair is most effective when it starts early, before the next rain turns a small opening into a stained ceiling, wet insulation, or damaged decking.

    The first priority is safety. Do not climb onto a storm-damaged roof, especially if shingles are loose, the surface is wet, or power lines and tree limbs are nearby. A careful ground-level check, followed by a professional inspection, gives you a clearer picture without putting anyone at risk.

    What Wind Does to a Roof

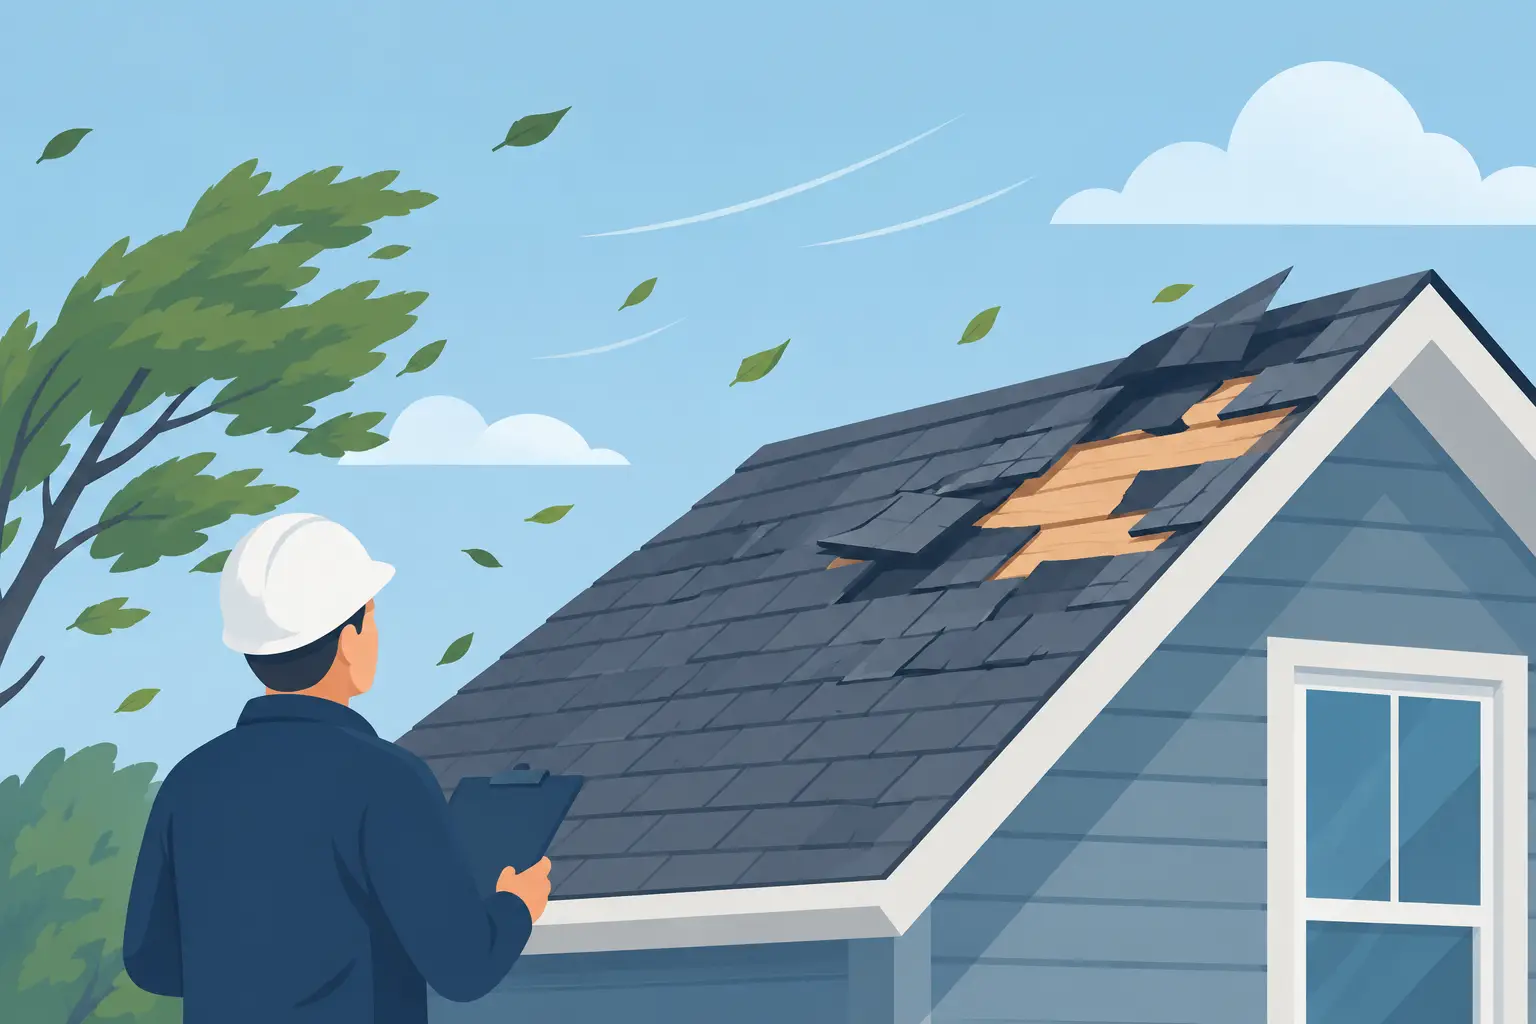
    Wind damage is not always dramatic. High gusts can pull at the edges of shingles and create what roofers call a lifted tab or broken seal. Once a shingle loses its seal, later winds can catch it more easily. That small change may allow rain to work underneath the roofing material.

    The most vulnerable areas are often roof edges, ridge caps, valleys, vents, chimneys, skylights, and flashing around penetrations. These areas handle changing directions of wind and water, so a problem there can become a leak faster than a damaged shingle in the middle of a broad roof slope.

    A storm may also blow debris across the roof. Branches can crack shingles, dent metal components, clog gutters, or scrape protective granules from asphalt shingles. On older roofs, wind can expose weaknesses that were already developing from age, sun, and moisture.

    That is why a roof does not need to be missing large sections of shingles to need attention. The goal is to find the damage while a targeted repair is still possible.

    Signs You May Need Wind Damage Roof Repair

    Start by walking around the property from the ground in good daylight. Look for shingles in the yard, on the driveway, or near downspouts. Check whether any roof areas appear uneven, bare, curled, lifted, or darker than the surrounding shingles. A ridge cap that looks shifted or a vent that appears crooked deserves a closer look.

    Inside, inspect the attic and upper-level ceilings when it is safe to do so. Fresh water spots, damp insulation, a musty odor, peeling paint, or a brown ring around a ceiling fixture can all point to moisture intrusion. Keep in mind that water may travel along framing before it shows up indoors, so the stain is not always directly below the roof opening.

    Gutters can offer clues as well. After a storm, look for heavy shingle granules in the gutter run or at the bottom of downspouts. Some granule loss is normal as shingles age, but a sudden concentration after high winds may indicate surface damage.

    Commercial property owners and managers should also check rooftop equipment areas, parapet walls, drains, and flashing transitions. Wind-driven rain often finds weaknesses at seams and penetrations that are easy to miss during a routine walk around the building.

    What to Do Right After a Windstorm

    If you see obvious damage or water is entering the home, protect people and belongings first. Move furniture, electronics, and valuables away from the affected area. Place containers under active drips if you can do so safely, and avoid touching wet electrical fixtures or outlets. If water is near electrical equipment, contact a qualified professional promptly.

    Take clear photos from the ground and inside the home. Photograph missing materials, fallen branches, ceiling stains, wet areas, and any visible damage around gutters or siding. Note the date of the storm and when you first noticed the issue. This record can be useful when you speak with your own insurance company or plan repairs.

    Then schedule a professional roof inspection. A trained inspector can check areas that are not visible from the ground, assess whether shingles have lost their seals, and look for damage around flashing and vents. At Real Good Roofing, inspections can include dated photos, measurements, and a written estimate so property owners have straightforward documentation of the roof’s condition.

    If the roof is actively leaking, temporary protection may be needed before permanent repairs can be completed. The right solution depends on the roof type, the size of the opening, weather conditions, and whether the underlying deck has been affected. A tarp may limit additional water intrusion in some situations, but it must be installed correctly. An improperly secured tarp can create more damage or become a hazard in the next round of wind.

    Repair or Replacement? It Depends on the Damage

    Many wind-related problems can be repaired without replacing the entire roof. Replacing a limited number of shingles, resealing a lifted section, repairing flashing, resetting a vent, or addressing a small deck repair may restore protection when the rest of the system is in sound condition.

    A larger project may make more sense when damage is widespread, the roof is near the end of its expected service life, or matching materials are no longer available. Multiple repairs across an aging roof can add up, and patchwork may not provide the long-term reliability a homeowner needs. The condition of the decking, ventilation, drainage, and prior repairs also affects the recommendation.

    This is where a clear inspection matters. A trustworthy contractor should explain what was found, show you the affected areas when possible, and distinguish between work that is urgent and work that can be planned. You should understand whether the recommendation is a focused repair, maintenance work, or a replacement – and why.

    Why Waiting Can Cost More

    A lifted shingle is not always an emergency, but it should not be ignored. Rain driven by wind can get beneath damaged shingles and wet the underlayment or roof deck. Over time, trapped moisture can lead to wood deterioration, mold concerns, insulation damage, and interior repairs that go far beyond the original roofing issue.

    Waiting also makes it harder to identify the original source of a leak. By the time water reaches the ceiling, it may have moved through several layers of the roof system. Addressing the problem promptly gives the roofer a better chance to make a precise repair and limit the area that needs to be opened or replaced.

    For rental properties, offices, and retail spaces, quick action also helps reduce disruption. A minor roof opening can threaten inventory, equipment, tenant spaces, and daily operations during the next rain event.

    Choosing a Roofer After Storm Damage

    After severe weather, homeowners may hear from contractors they have never seen in the community. Before agreeing to work, take time to verify that the company is established, communicates clearly, and can explain its inspection findings in plain language.

    Ask whether the contractor will document the damage with photos and provide a written estimate. Find out who will perform the work, what materials are being proposed, and how the property will be protected during the repair. For difficult-to-see areas, drone inspection technology can provide useful visual documentation without unnecessary foot traffic on a damaged roof.

    Local experience matters because roofing in Savannah, Pooler, and the Lowcountry has to handle intense sun, humidity, heavy rain, and sudden coastal windstorms. A repair should address more than the visible shingle. It should restore the roof’s ability to shed water and stand up to the conditions the area regularly delivers.

    Preventing the Next Wind-Related Problem

    No roof can be made completely storm-proof, but regular maintenance can reduce the chance that a small weakness becomes major damage. Keep gutters and downspouts clear so water can drain away from the roofline. Trim back limbs that hang over the roof, particularly dead or weakened branches that may fall during a storm.

    It also helps to schedule periodic inspections, especially for an older roof or after a season of heavy weather. An inspection can identify loose flashing, worn sealant, exposed fasteners, deteriorating pipe boots, and early shingle wear before high winds take advantage of them.

    When repairs are needed, choose quality workmanship over the fastest-looking fix. Properly installed shingles, flashing, ventilation components, and gutter systems work together. Skipping one detail may leave the same area vulnerable when the next storm arrives.

    If a recent storm has you questioning your roof, trust what you can see from the ground, but do not stop there. A prompt, professional inspection can replace uncertainty with a clear plan to protect your home before the weather has another chance to get in.

  • Hail Damage Roof Repair Starts With an Inspection

    Hail Damage Roof Repair Starts With an Inspection

    A hailstorm can leave your yard covered in ice and your roof looking perfectly normal from the driveway. That is what makes hail damage roof repair easy to put off and risky to ignore. Even small impact marks can weaken shingles, crack protective granules loose, or damage flashing around the areas where roofs commonly leak.

    For homeowners in Coastal Georgia and the South Carolina Lowcountry, a timely inspection is the sensible first move after a storm. It gives you a clear picture of your roof’s condition before a hidden problem turns into a ceiling stain, wet insulation, wood rot, or a more extensive repair.

    Why Hail Damage Is Not Always Easy to See

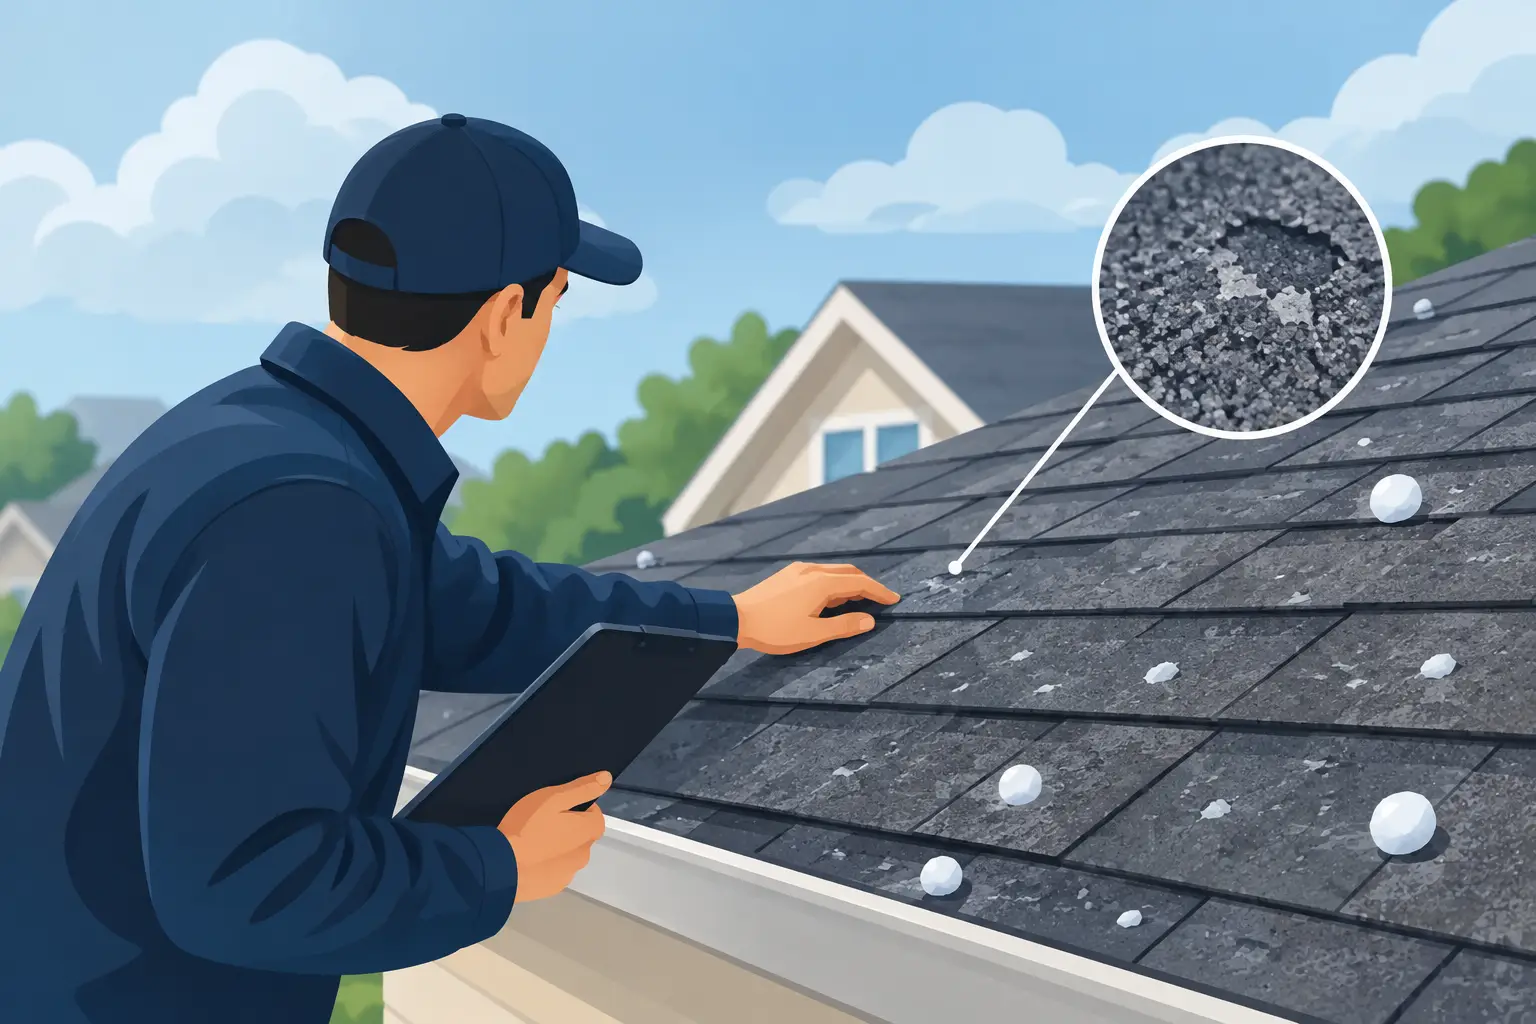
    Hail does not damage every roof the same way. Its effect depends on the hail’s size and density, wind speed and direction, the age and condition of the roofing materials, and the slope of the roof. A newer architectural shingle may show subtle bruising where the shingle mat has been compromised beneath the surface. An older roof may shed granules more readily or crack at the impact point.

    From the ground, homeowners may notice dark spots, bare patches, or scattered granules near downspouts. Those are worth checking, but they do not tell the whole story. Hail can also dent metal vents, ridge caps, gutters, flashing, and other roof components without creating an immediate water leak.

    The concern is not simply appearance. Shingle granules shield the asphalt layer from sun exposure. When hail knocks them loose or bruises the shingle beneath them, weathering can accelerate. A roof may keep water out for now, then develop leaks after repeated rain, heat, and wind put stress on the weakened areas.

    What to Do After a Hailstorm

    Start safely. Do not climb onto a wet roof, walk across damaged shingles, or use a ladder unless you have the right equipment and experience. Roof damage can be slippery and hard to recognize underfoot.

    A practical post-storm check starts at ground level. Walk around the home and look at roof edges, gutters, metal vents, siding, window screens, outdoor equipment, and vehicles. Damage to these surfaces can be a sign that the roof received impacts too, though it is not proof of a roofing problem by itself.

    If conditions are safe, document what you can see. Take wide photos of the property and closer photos of visible dents, debris, or displaced materials. Then look indoors for fresh water marks on ceilings, damp attic insulation, dripping, or daylight around roof penetrations. If water is actively entering the home, place containers below the leak, move valuables out of the area, and arrange emergency roofing help promptly.

    Avoid quick fixes that create bigger problems. Do not nail tarps through shingles unless it is necessary to limit active water entry and you know how to secure one correctly. Do not pressure wash the roof or attempt to brush off loose granules. Those actions can cause additional damage and make a proper assessment harder.

    When Hail Damage Roof Repair Is Needed

    A professional inspection separates cosmetic scuffs from damage that affects the roof’s service life. A qualified roofer should examine the shingle field, ridge caps, valleys, pipe boots, vents, flashing, gutters, and roof edges. Attic conditions matter, too, because moisture or ventilation issues can reveal problems that are not visible outside.

    Repair is often the right answer when damage is limited to a specific area or component. For example, a roofer may replace affected shingles, repair damaged flashing, reseal a penetration, replace a cracked pipe boot, or correct a loosened vent. The goal is to restore the roof’s weather protection while matching existing materials as closely as practical.

    A repair should not be a guess. Good work begins with identifying how water moves across the roof and where the system has been compromised. Simply covering a spot with sealant may slow a leak for a short time, but it is not always a durable solution for hail-bruised shingles or damaged flashing.

    Real Good Roofing uses thorough roof evaluations, including FAA-certified drone inspections when appropriate, to document hard-to-see areas without putting people or your roof at unnecessary risk. Homeowners can receive dated photos, measurements, and a written estimate so they have a straightforward record of the roof’s observed condition and recommended work.

    Repair or Replacement: How to Make the Call

    Not every hail-damaged roof needs to be replaced. If the roof is relatively young, the damage is contained, and compatible replacement materials are available, a focused repair can be the more cost-effective choice. It addresses the immediate vulnerability while preserving the sound portions of the roof.

    Replacement becomes more reasonable when hail damage is widespread, shingles are brittle or nearing the end of their expected life, multiple slopes have compromised materials, or repairs would leave the roof with too many mismatched sections. Existing issues also matter. A roof with recurring leaks, deteriorated decking, failed ventilation details, or previous patchwork may not be a good candidate for another isolated repair.

    There is a trade-off in either direction. Repairing a roof that has broad damage can mean additional work later. Replacing a roof with limited damage can be more work than the situation requires. An honest inspection and clear estimate help you weigh durability, appearance, timing, and budget without pressure.

    What a Quality Repair Should Address

    A dependable hail repair is more than replacing whatever is visibly dented. The contractor should check the surrounding system because connected components often fail together. A shingle repair, for example, may require attention to underlayment, starter strips, nails, flashing, and the seal between shingles.

    Ask practical questions before work begins: What materials are damaged? Is the issue confined to one roof plane? Will nearby shingles need to be lifted, and are they flexible enough to be handled safely? How will flashing and penetrations be protected? What will the finished repair look like from the ground?

    Color matching can be an important consideration. Roofing materials fade with age, and an exact match is not always available. A professional should explain that possibility upfront rather than treating it as an afterthought. Even when a repair is structurally sound, homeowners deserve to understand how it may look once complete.

    Do Not Wait for a Leak to Act

    The best time to inspect a roof after hail is before water finds a path inside. A roof can appear stable through one storm and fail during the next hard rain because the protective surface was weakened weeks or months earlier. Prompt attention also helps prevent moisture from reaching insulation, decking, framing, and interior finishes.

    Once repairs are complete, keep an eye on your roof through the next few rains. Check the attic periodically, clear gutters of leaves and shingle debris, and schedule routine inspections as the roof ages. Preventive maintenance is usually simpler than responding to a leak after it has spread.

    A hailstorm does not have to leave you guessing about your roof. A careful inspection, clear documentation, and properly scoped repair can give you a sound path forward and help keep your home protected when the next storm rolls through.

  • Roof Inspection Before Buying a House: What It Finds

    Roof Inspection Before Buying a House: What It Finds

    The roof can look perfectly fine from the driveway and still be carrying hidden storm damage, aging materials, or active moisture problems. A roof inspection before buying a house gives you a clearer picture of one of the property’s biggest protection systems before you move forward with a purchase. For buyers in Coastal Georgia and the South Carolina Lowcountry, where heat, humidity, wind, and heavy rain put roofs under regular stress, that information can change how you evaluate the home.

    A general home inspection is still essential, but it may not provide the close, roof-specific assessment needed to identify subtle concerns. A dedicated roofing inspection helps you understand whether the roof needs a minor repair, preventive maintenance, or more significant planning after closing.

    Why a Roof Inspection Before Buying a House Matters

    A roof problem rarely stays limited to the roof. Water can move beneath shingles, through decking, into attic insulation, and down walls before a stain appears on a ceiling. By the time interior symptoms are visible, the repair may involve more than replacing a few shingles.

    That is why buyers should not rely on appearance alone or assume a roof is sound because it did not leak during a showing. A roof may be near the end of its service life without an active leak. It may also have wind-lifted shingles, compromised flashing, damaged pipe boots, soft decking, or drainage issues that only become obvious during a trained inspection.

    The goal is not to expect a roof to be brand-new. Older homes can have roofs with normal wear that remain serviceable. The goal is to know what condition the roof is in, what risks are present, and what you should reasonably plan for as the next owner.

    What a Professional Roof Inspection Can Reveal

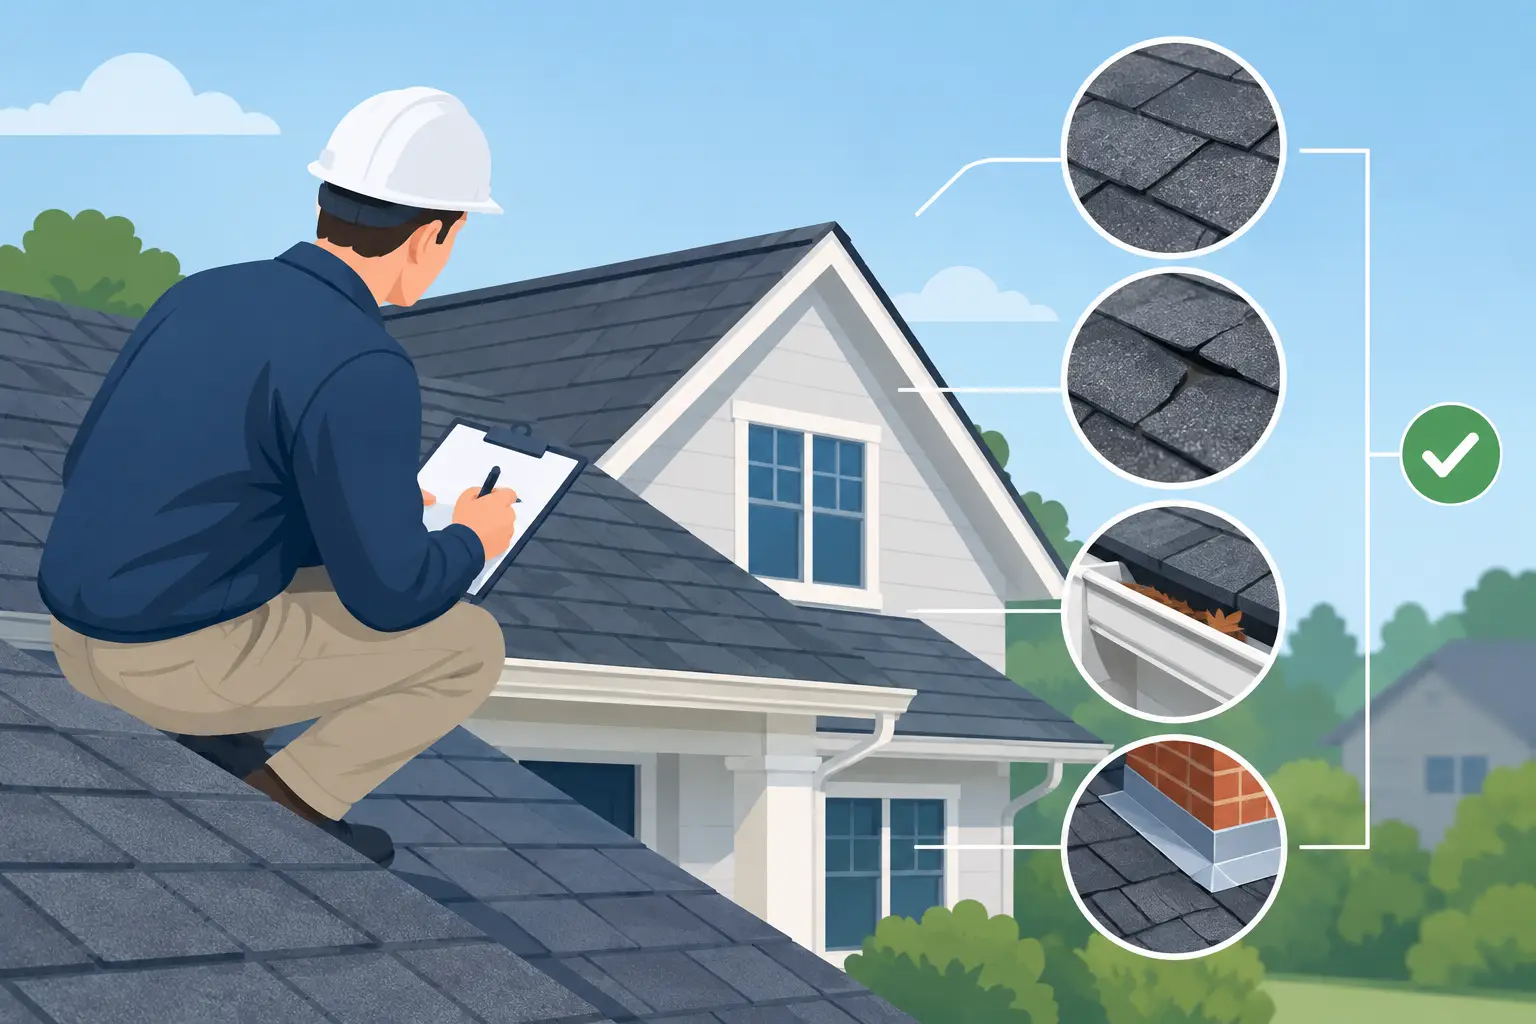
    A qualified roofer evaluates the roof as a complete system, not simply as a field of shingles. That includes the visible roofing material, the areas where water is most likely to enter, drainage components, ventilation, and accessible attic conditions.

    Remaining service life and material condition

    Roofing materials wear gradually. Granule loss, brittle shingles, curling edges, exposed fasteners, rust, cracked sealant, and worn flashing can indicate a roof that is aging out. An inspection cannot always put an exact number of years on a roof, because installation quality, storm exposure, tree coverage, ventilation, and maintenance all affect longevity. It can, however, provide a realistic assessment of whether the roof appears to have useful life remaining or should be budgeted for soon.

    This matters when comparing homes. A house with an older but well-maintained roof may still be a reasonable purchase. A house with extensive wear, multiple prior repairs, and signs of moisture intrusion deserves a more cautious look.

    Storm and wind damage

    Coastal weather can leave damage that is easy to miss from the ground. Wind may crease or lift shingles without removing them completely. Hail can bruise roofing materials. Falling limbs can crack shingles, puncture metal, or damage gutters and flashing.

    A roofing professional can look for patterns that distinguish normal aging from damage. Photos and written findings give buyers useful documentation to review with their real estate professional, seller, and other advisors as they decide how to proceed.

    Leaks and moisture pathways

    The highest-risk areas are often not in the middle of the roof. Leaks commonly develop around penetrations and transitions, including vent pipes, chimneys, skylights, valleys, sidewalls, and roof-to-wall connections. Flashing at these locations must direct water away from the home, and even a small failure can create a persistent issue.

    When attic access is available, an inspection may also identify water staining, damp insulation, mold-like growth, daylight through the decking, or sagging wood. These signs do not automatically mean the entire roof must be replaced, but they do call for a closer assessment of the cause and extent of the damage.

    Decking, ventilation, and drainage concerns

    A roof needs more than good shingles. The decking beneath the roof covering must remain solid, attic ventilation must help manage heat and moisture, and gutters must move water away from the structure.

    Poor ventilation can contribute to excessive attic heat and premature material wear. Clogged or poorly pitched gutters can cause water to back up near the roof edge. Soft or uneven decking can suggest previous moisture exposure. These are details a buyer may not see during a quick property visit, yet they affect the long-term performance of the roof.

    When to Schedule the Inspection

    Schedule the roofing inspection during your due-diligence period, as early as possible after the property is under contract. Waiting until the final days can create unnecessary pressure if a concern is discovered and you need time to gather more information.

    It is especially wise to arrange a roof inspection when the home has an older roof, visible staining, nearby overhanging trees, recent storm exposure, patchwork repairs, or a seller disclosure that leaves questions unanswered. It can also be worthwhile when the general inspector notes roof wear but cannot determine the source or severity of a concern.

    If access is limited or the roof is steep, drone inspection can provide a detailed view of areas that are not safe to walk. FAA-certified drone inspections can capture clear images of the roof surface while reducing the need to disturb fragile materials. A drone view is useful, but it works best as part of a full professional assessment that includes accessible exterior and attic areas.

    Questions to Ask After the Inspection

    The most useful inspection report is one that explains findings in plain language. Ask whether any issue is active, whether it needs immediate attention, and what could happen if it is delayed. You should also ask whether a repair is likely to address the concern or whether the roof is approaching replacement territory.

    Request clear photos, especially for damage that is not visible from the ground. Dated photos, measurements, and a written estimate can help you keep records organized as you evaluate the property. A good contractor should be direct about uncertainty too. For example, some concealed damage cannot be confirmed until materials are removed, and a responsible inspection should say so rather than make promises the roof cannot support.

    It also helps to ask about prior repairs. A few properly completed repairs are not necessarily a red flag. Repeated patches in several areas, however, can signal a roof that has been managed in small increments and may need a more complete solution soon.

    How Inspection Findings Can Affect Your Purchase Decision

    Inspection results do not always mean you should walk away from a house. They give you the facts needed to make a decision with fewer surprises. A buyer may choose to proceed because the needed repair is manageable. Another may decide that the roof’s age and condition should factor into the offer, the repair request, or the budget for improvements after closing.

    Consider the full picture. A roof with several years of life left may still need small maintenance work. A newer roof may have installation defects that deserve attention. A replacement recommendation may be reasonable if materials are widely worn, but the scope should be supported by visible evidence and a clear explanation.

    For homes in this region, timing also matters. Buying just before hurricane season or a period of frequent heavy rain can make unresolved roofing issues more urgent. Knowing the roof’s condition before you own the home lets you prioritize repairs and avoid discovering a problem during the first major storm.

    Choose a Roofing Professional Who Explains the Evidence

    The inspection is only as useful as the communication that follows it. Look for a local roofing professional who can explain the findings without pressure, document concerns clearly, and distinguish between immediate needs and future planning. Certifications, field experience, and a strong local reputation matter because coastal roofing conditions are not theoretical here – they are part of everyday property ownership.

    Real Good Roofing provides detailed roof inspections for homeowners across Pooler, Savannah, Coastal Georgia, and the South Carolina Lowcountry, including photo documentation and straightforward repair or replacement recommendations when work is needed.

    Before you commit to a home, make sure the roof has had the same careful attention you would give the foundation, electrical system, or plumbing. A clear inspection can turn a question mark over the property into a plan you can act on.

  • How to Spot a Roof Flashing Repair Leak Early

    How to Spot a Roof Flashing Repair Leak Early

    Water does not always enter a roof through a missing shingle. Often, the trouble starts where the roof changes direction or meets another surface. A roof flashing repair leak can allow water behind shingles, siding, trim, or roofing underlayment, where damage may grow long before a stain appears on the ceiling.

    Flashing is a small part of the roofing system with a big job. It directs rain away from the vulnerable joints around chimneys, roof valleys, vent pipes, skylights, dormers, and walls. When that material loosens, rusts, cracks, or is installed incorrectly, the roof may look fine from the yard while water is moving into places it should never reach.

    When a Roof Flashing Repair Leak Needs Attention

    A flashing leak deserves attention as soon as you suspect it, especially in Coastal Georgia and the Lowcountry, where heavy rain, wind-driven storms, salt air, and long humid stretches put roofing materials to work. A small opening can become a bigger problem after one hard storm.

    The warning signs are not always dramatic. You may notice a brown ceiling spot near a chimney or exterior wall, peeling paint, damp insulation in the attic, or a musty odor after rainfall. In some cases, water shows up far from the actual opening because it travels along roof decking, rafters, or framing before dripping.

    Outside, visible signs can include lifted flashing edges, separated sealant, exposed fasteners, rust on older metal flashing, cracked pipe boots, or shingles that have pulled away from a sidewall. These conditions do not confirm the full extent of the issue on their own, but they are strong reasons to schedule a professional inspection.

    If water is actively entering the home, place a container under the drip if it is safe to do so and move furniture, electronics, and valuables away from the area. Avoid climbing onto a wet roof or trying to seal the area during a storm. Emergency roof conditions are best assessed from the ground and handled by trained professionals with the proper equipment.

    Why Flashing Fails

    Flashing is typically made from metal, though modern roofing systems also use specialized membranes, pipe boots, sealants, and transition materials. It works only when each component overlaps correctly and remains securely integrated with the surrounding roofing.

    Age is one common cause of failure. Sealant dries out, metal can corrode, and repeated expansion and contraction can open small gaps. Wind can lift nearby shingles or loosen flashing at roof-to-wall connections. Tree limbs and storm debris can bend metal or crack a vent boot. Even a repair completed years ago may fail if it relied too heavily on surface caulk instead of properly layered flashing.

    Installation details matter just as much. Water needs a clear path down and off the roof. If flashing was nailed in the wrong location, tucked beneath materials incorrectly, or not extended far enough, rain can work behind it. This is why a quick patch is not always the right repair. The visible gap may be only one part of a larger installation problem.

    The Areas Where Leaks Commonly Start

    Chimneys are a frequent source of flashing trouble because they interrupt the roof plane on several sides. Proper chimney flashing generally includes step flashing along the edges, counterflashing tied into the masonry, and a cricket or saddle behind wider chimneys to divert water. A failed caulk line around a chimney may be the symptom, not the full solution.

    Sidewalls and dormers also require careful step flashing. Each piece should work with the shingle course below it so water sheds outward rather than running behind the wall covering. When siding, trim, or roofing materials conceal this area, a careful inspection becomes especially valuable.

    Pipe penetrations need attention too. The rubber or synthetic boot around a plumbing vent can crack from sun exposure, and the flashing flange beneath the surrounding shingles can shift or fail. Skylights, valleys, attic vents, and transitions between a roof and an exterior wall all have their own flashing requirements.

    A leak near one of these areas does not automatically mean the flashing alone is at fault. Damaged shingles, worn underlayment, clogged gutters, masonry cracks, or siding defects can create similar symptoms. A good inspection identifies where water is entering before repair work begins.

    What a Proper Flashing Repair Looks Like

    The right repair depends on the roof type, the location of the failure, and the condition of the surrounding materials. In a limited repair, a roofer may remove shingles around the affected area, replace damaged step flashing or pipe flashing, install compatible underlayment, and reinstall or replace shingles as needed. The goal is to restore the layered water-shedding system, not just cover a gap.

    For a chimney, the work may involve replacing corroded flashing, correcting counterflashing, or addressing damaged mortar joints. Around a wall, it may require removing a section of siding or trim so the flashing can be properly integrated. Those extra steps can feel inconvenient, but leaving hidden failed materials in place can invite the same leak back.

    Sealant has a role in roofing, but it is not a substitute for sound flashing. A patch of roofing cement or caulk may slow water temporarily in the right situation. It should not be presented as a permanent answer when metal flashing, shingles, or underlayment have failed underneath.

    Matching materials also matters. New flashing should be compatible with the roof system and surrounding metals. The repair should protect the drainage path, preserve shingle performance, and avoid creating unnecessary nail holes or raised areas that catch water.

    Repair or Replacement: How to Make the Call

    Not every roof flashing repair leak means the entire roof needs replacement. If the roof is generally in good condition and the problem is isolated, a focused repair can be a sensible way to protect the home and extend the roof’s service life.

    Replacement becomes more likely when flashing failures appear in several locations, shingles are brittle or broadly damaged, roof decking has widespread moisture damage, or the roof is near the end of its useful life. Repeated leaks at multiple penetrations can also indicate that the roof system needs more than another small patch.

    The best decision comes from the condition of the whole roof, not a guess based on one ceiling stain. A thorough inspection should look at flashing, shingles, penetrations, attic conditions when accessible, gutters, and the roof’s drainage patterns. Dated photos, measurements, and a written estimate give property owners a clear record of what was found and what repair options make sense.

    Do Not Wait for Visible Interior Damage

    By the time water reaches drywall, it may already have affected insulation, roof decking, framing, or exterior trim. Moisture can encourage mold growth and wood deterioration, and a small repair can turn into a larger restoration project if it is left through multiple rain events.

    That does not mean every stain signals a roofing emergency. Condensation, plumbing leaks, and HVAC issues can also produce interior moisture. But if the spot worsens after rain, appears near a roof transition, or is accompanied by visible flashing damage, it is wise to have the roof checked promptly.

    For homeowners in Pooler, Savannah, and surrounding coastal communities, storm-season inspections can be especially useful after strong winds or wind-driven rain. A trained roofer can assess conditions that are difficult to see safely from the ground, including with drone imagery when appropriate.

    Get the Cause Fixed, Not Just the Drip Covered

    A roof should give your home dependable protection in ordinary rain and during the weather that puts Coastal Georgia roofs to the test. Real Good Roofing approaches flashing concerns by identifying the source of the water, explaining the condition in plain language, and recommending the repair that fits the roof rather than applying a one-size-fits-all patch.

    If you have noticed a stain, a drip, loose metal, or a problem around a chimney or vent, acting early gives you more options. A careful inspection and a properly built repair can keep a small flashing issue from becoming damage hidden behind the walls.

  • Flat Roof Repair for Commercial Buildings

    Flat Roof Repair for Commercial Buildings

    A drip above a retail display, a stained ceiling tile in an office, or water collecting near rooftop equipment can turn into a costly interruption fast. Flat roof repair commercial buildings need is not just about stopping visible water. It is about finding the path water took, protecting the structure below, and making a repair that holds up through the next hard rain.

    For business owners and property managers, the right response balances urgency with good judgment. A small leak may need a targeted repair. Widespread seam failure, recurring ponding water, or wet insulation may point to a larger restoration or replacement decision. A thorough inspection gives you the information to choose wisely.

    Why Commercial Flat Roof Leaks Need Prompt Attention

    Flat commercial roofs are designed with low slopes, drains, scuppers, and carefully sealed details that move water off the building. When one part of that system fails, water can travel beneath the roofing membrane before it appears inside. The ceiling stain is often far from the actual opening.

    That is why waiting for a leak to get worse is rarely a cost-saving move. Water can saturate insulation, weaken roof decking, damage interior finishes, affect electrical areas, and create conditions for mold growth. In a restaurant, medical office, warehouse, or apartment building, it can also disrupt operations and inconvenience tenants or customers.

    Coastal Georgia weather adds another layer of pressure. Heavy rain, wind-driven storms, high humidity, intense sun, and debris can all wear on a commercial roof over time. After a storm, loose flashing, punctures, lifted edges, and clogged drainage points deserve a prompt inspection, even when there is no obvious leak indoors.

    Common Flat Roof Problems on Commercial Buildings

    A commercial flat roof can be built with several systems, including TPO, PVC, EPDM, modified bitumen, and coated assemblies. Each has different strengths, but most leaks develop at transitions and details rather than in the open field of the roof.

    Failed Seams and Flashing

    Seams connect sections of membrane, while flashing seals roof edges, wall transitions, vents, curbs, drains, and penetrations. Heat, movement, age, poor installation, and storm damage can cause these areas to pull apart or lose their seal. A repair may involve cleaning and preparing the surface, then installing compatible material and properly sealing the detail.

    Ponding Water and Drainage Trouble

    A flat roof should not hold standing water for extended periods after rain. Ponding water puts extra stress on seams and coatings, accelerates deterioration, and can reveal a drainage issue. The cause may be blocked drains, debris-filled scuppers, sagging areas, or inadequate slope.

    Clearing a drain can solve a simple problem, but repeated ponding calls for a closer look. A repair that ignores the underlying drainage condition may only buy time.

    Punctures and Surface Damage

    Service traffic is a regular part of commercial property ownership. HVAC maintenance, satellite equipment, plumbing work, and other rooftop access can create punctures or damage protective surfacing. Tree limbs, windblown debris, and dropped tools can do the same.

    Small punctures are often repairable when addressed quickly. They become more serious when water enters the roofing layers and spreads beneath the membrane.

    Blisters, Cracks, and Aging Materials

    Temperature swings cause roofing materials to expand and contract. Over years of exposure, an older system may develop cracks, blisters, split seams, or brittle flashing. Not every aged roof requires immediate replacement, but a pattern of recurring failures is a sign to evaluate the roof as a whole instead of repairing one spot at a time.

    What a Proper Commercial Flat Roof Inspection Should Cover

    The goal of an inspection is to identify both the active leak and the roof conditions that could cause the next one. A reliable roofer should examine membrane seams, penetrations, perimeter edges, flashing, drains, scuppers, rooftop equipment areas, and visible signs of trapped moisture or surface deterioration.

    Interior observations matter too. Water stains, soft ceiling areas, damp insulation, musty odors, and leak timing can help trace the problem. If water appears only during wind-driven rain, for example, wall flashing or edge details may be more likely than an opening in the roof field.

    For large or hard-to-access roofs, drone imagery can provide a broader view of the surface and help document visible conditions safely. It does not replace close-up hands-on inspection of suspect areas, but it can be useful for understanding the roof layout and spotting drainage patterns or storm-related concerns.

    A good inspection should end with clear findings and practical options. You should understand what is leaking, what work is recommended now, what conditions should be monitored, and whether a repair is likely to offer dependable service life.

    Repair, Restoration, or Replacement: How to Decide

    There is no one answer for every commercial roof. The best choice depends on the age of the system, the extent of moisture damage, how often leaks have occurred, the condition of insulation and decking, and your plans for the property.

    A targeted repair is often the sensible choice when damage is isolated and the remaining roof is in good condition. Repairing a split seam, damaged boot, loose flashing section, or localized puncture can protect the building without taking on unnecessary work.

    A restoration approach may make sense when the roof is still structurally sound but showing broad surface wear. Depending on the existing roof system and its condition, a compatible coating or restoration system can extend service life. Surface preparation and moisture evaluation are critical here. Coating over active leaks, loose material, or wet insulation does not solve the problem.

    Replacement becomes the more responsible option when the roof has widespread deterioration, recurring leaks in multiple areas, extensive saturated materials, or an assembly near the end of its useful life. It is a bigger project, but it can reduce the ongoing disruption and uncertainty of repeated repairs. A transparent contractor should explain why replacement is being recommended rather than treating it as the default answer.

    How to Limit Disruption While Repairs Are Underway

    Commercial roof work needs planning, especially when tenants, employees, inventory, customers, or sensitive equipment are below. Before work begins, identify access points, delivery routes, rooftop equipment that must remain available, and interior areas that need protection.

    For an active leak, temporary measures may be needed while conditions allow for a permanent repair. The permanent work should then be scheduled around weather, material requirements, and business operations. Some repairs are brief and localized; larger restorations or replacements require a more detailed schedule.

    Communication is part of the work. Property managers should know what areas crews will access, whether there may be noise or odors, how long the work is expected to take, and what conditions could change the schedule. A clear plan helps avoid surprises for tenants and staff.

    Preventive Maintenance Protects the Roof You Already Have

    Many commercial roof problems begin as manageable maintenance issues. Seasonal inspections can catch debris buildup, cracked sealant, open seams, damaged flashing, and drainage trouble before water reaches the interior.

    A practical maintenance routine includes keeping drains and scuppers clear, limiting unnecessary foot traffic, requiring care around rooftop equipment, and documenting repairs and inspections. After severe weather, a timely check is especially worthwhile. Small storm damage is easier to address before the next round of rain exposes it.

    If your property has several buildings or a large roof footprint, a written maintenance schedule can help prioritize work and budget for future needs. It also gives owners and managers a clearer record of how the roof has performed over time.

    Choose a Contractor Who Explains the Work Clearly

    Commercial flat roofing is detail-driven work. The quality of seam preparation, flashing installation, drainage corrections, and material compatibility matters as much as the visible patch. Look for a contractor willing to inspect carefully, explain the findings in plain language, and provide a written scope that matches the condition of the roof.

    Real Good Roofing brings a local, family-rooted approach to commercial roof repairs throughout Coastal Georgia and the Lowcountry. Our team focuses on responsive inspections, straightforward recommendations, and workmanship designed to protect the property beneath the roof.

    When water appears inside, do not assume the visible stain tells the whole story. A prompt, professional inspection can turn an urgent leak into a clear plan for protecting your building, your operations, and the people who rely on both.

  • Roof Damage Insurance Claim Documentation Checklist

    Roof Damage Insurance Claim Documentation Checklist

    A storm can leave behind more than a few shingles in the yard. A small roof opening can allow water into insulation, ceilings, and wall cavities long after the rain stops. That is why roof damage insurance claim documentation should begin as soon as it is safe to inspect the property. Clear, organized records give you a dependable file to reference when speaking with your insurance company and planning needed repairs.

    For homeowners in Coastal Georgia and the South Carolina Lowcountry, wind-driven rain, fallen limbs, hail, and tropical weather can create damage that is not always visible from the ground. The goal is not to guess at the extent of the problem. It is to preserve the facts: what happened, when it happened, what changed at your home, and what a professional inspection found.

    Start With Safety and Prevent Further Damage

    Do not climb onto a storm-damaged roof to take pictures. Wet shingles, loose materials, hidden punctures, and downed power lines can turn a simple inspection into an emergency. Photograph what you can safely see from the ground, including missing shingles, bent flashing, damaged gutters, fallen branches, and debris around the property.

    If water is entering the home, take reasonable steps to limit additional interior damage. Move belongings away from the leak, place containers beneath active drips, and photograph stained drywall, wet flooring, damaged furniture, or other affected areas before cleanup begins. Keep receipts for emergency materials or temporary protective work.

    Temporary protection is not the same as a permanent repair. A tarp or other short-term measure may help keep water out, but the roof still needs a proper assessment. Waiting through several more rainstorms can make it harder to separate the original storm damage from later deterioration.

    What to Include in Roof Damage Insurance Claim Documentation

    A useful documentation file tells a clear story without requiring anyone to fill in the gaps. Start a folder on your phone, computer, or cloud storage and keep every related item together. Name files by date so they are easy to find later.

    Your records should include these core pieces:

    • Dated photos and videos of exterior roof damage, gutters, siding, fascia, vents, skylights, and debris
    • Photos of interior water damage, including ceilings, walls, attic areas, insulation, and personal property
    • Weather details, such as the storm date, local alerts, wind reports, hail reports, or nearby tree damage
    • Maintenance records, prior repair invoices, roof warranty information, and photos taken before the storm if available
    • Written inspection findings, roof measurements, and a detailed repair or replacement estimate
    • Receipts for reasonable emergency protection, cleanup, or temporary repairs

    Wide photos establish the overall condition of the property. Closer photos show the specific damage. When possible, take both. For example, photograph the entire roof slope from the ground, then take a closer image of a missing-shingle area using a safe angle or a professional inspection image.

    Avoid editing photos beyond basic file organization. Original, time-stamped images are generally more useful than heavily marked-up screenshots. If you add notes, keep the original image and save the annotated copy separately.

    Keep a Simple Damage Log

    Photos matter, but a short written timeline can prevent confusion later. Record the date and approximate time of the storm, when you first noticed damage, where you saw leaks, and what temporary steps were taken. Add the date of each inspection, repair visit, phone call, and document received.

    Use plain language. “Water stain appeared on the living room ceiling after heavy wind and rain on May 14” is more helpful than “ceiling damage.” Facts are stronger than assumptions, especially when the roof has several affected areas.

    Get a Professional Roof Inspection Early

    Not every roofing problem is obvious from a driveway. Wind can lift shingles without tearing them completely off. Hail may leave subtle impact marks. Flashing can loosen around chimneys, vents, or wall transitions, creating a path for water that may not show up indoors until the next storm.

    A professional inspection creates a more complete record of the roof’s present condition. Ask for dated photographs, clear findings, measurements, and a written estimate that identifies the recommended scope of work. These documents can help you understand what needs attention and provide information you may choose to submit to your insurance company.

    Real Good Roofing provides storm-damage inspections with dated photos, measurements, and written estimates for property owners who need a clear picture of their roof’s condition. FAA-certified drone inspection capability can also help document areas that are difficult or unsafe to view from the ground.

    Coverage decisions, policy terms, and claim questions belong with your insurance company. A roofing professional’s role is to inspect the roof, document visible conditions, explain repair options, and provide an accurate scope for the work needed.

    Make the Estimate Easy to Read

    A vague estimate can leave you with more questions than answers. A useful roofing estimate identifies the affected roof sections, materials involved, labor needed, and related components such as flashing, underlayment, vents, gutters, siding, or trim when they are damaged.

    It should also distinguish between immediate repair needs and broader work that may be recommended because of the roof’s overall condition. That distinction matters. A recent storm may reveal an urgent opening around flashing, while an older roof may also have wear unrelated to that event. Good documentation does not force every issue into one category. It records what the inspection shows.

    If you receive more than one inspection or estimate, keep each document. Differences do not automatically mean one is wrong. Roof access, inspection methods, visible conditions, and the scope being evaluated can vary. Ask questions until you understand what each document includes.

    Document Interior Damage Before Repairs Begin

    Roof damage often becomes an interior problem quickly. Water can travel along rafters, framing, electrical pathways, or insulation before it appears as a stain. Photograph the first visible signs and revisit the area after the next rain if conditions change.

    For attic spaces, look for wet insulation, darkened wood, active dripping, mold-like staining, or daylight visible through the roof deck. Do not disturb wet electrical equipment or enter an attic with sagging ceilings or compromised framing. Those conditions call for prompt professional attention.

    After documenting the damage, do not delay necessary repairs just to preserve evidence. A well-documented condition paired with a qualified inspection is more useful than allowing a leak to cause additional damage. Keep copies of invoices and before-and-after photos for all completed work.

    Common Documentation Mistakes to Avoid

    The most common mistake is waiting too long. Storm damage can worsen, debris gets cleared, and temporary leaks can become harder to trace. Taking photos the day you notice a concern gives you a better starting point, even if a full inspection happens later.

    Another mistake is documenting only the roof. Gutters, downspouts, siding, window screens, exterior trim, fencing, and interior ceilings may provide important context after a severe weather event. Photograph the surrounding property without assuming every mark came from the same cause.

    Finally, do not rely on memory or verbal descriptions alone. Save emails, estimates, invoices, inspection reports, receipts, and photos in one place. A complete file saves time when you need to review dates, compare conditions, or schedule the right repairs.

    A roof protects everything beneath it, and storm damage deserves prompt attention. If you see missing materials, active leaks, or signs of water intrusion after severe weather, arrange a professional inspection, keep your records organized, and address needed repairs before the next storm has a chance to make a manageable problem larger.