Category: Uncategorized

  • How to Find a Roof Leak Before Damage Spreads

    How to Find a Roof Leak Before Damage Spreads

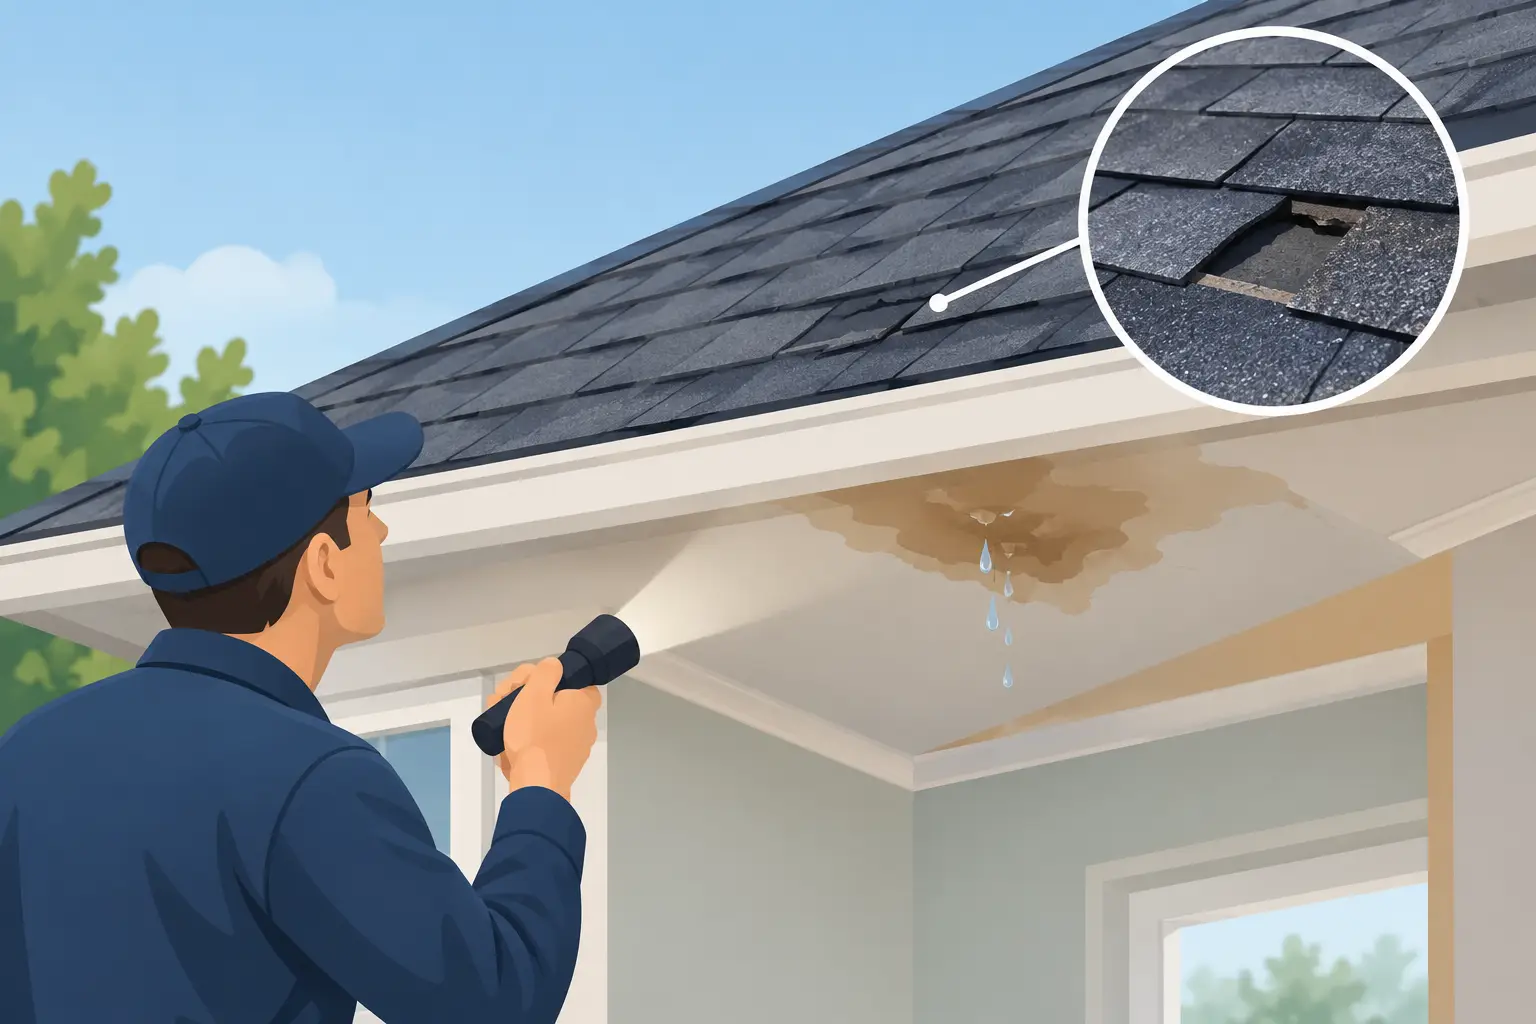
    A brown ceiling spot after a hard Georgia rain can feel like a small problem, but water rarely stays where it first appears. It can travel along roof decking, rafters, insulation, wiring, or wall framing before it reaches your ceiling. Knowing how to find a roof leak helps you act quickly, protect your home, and give a roofing professional a useful head start when repairs are needed.

    The goal is not to climb onto a wet roof or pull apart your ceiling. It is to narrow down the source safely, document what you see, and prevent more water from getting inside until the roof can be properly evaluated.

    Start Inside: Find the First Signs of Water

    Begin in the attic or the highest level of the home. If the leak is active, place a bucket under dripping water and move furniture, electronics, and valuables out of the area. If the ceiling is bulging, do not puncture it unless you understand the risk and can do so safely. A water-filled ceiling can collapse, and there may be electrical wiring nearby.

    Look for more than the obvious drip. Water stains, peeling paint, bubbling drywall, damp insulation, mildew odor, and warped trim can all point to moisture intrusion. Take photos of every affected area, especially after a storm. Those pictures can help a roofer compare interior symptoms with exterior conditions and can be useful if storm damage leads to an insurance claim.

    In the attic, use a bright flashlight and look for darkened wood, wet insulation, rusted nail tips, mold growth, or shiny areas on the underside of the roof decking. Follow those clues upward and outward, but remember that the wettest spot is not always the entry point. Water may run several feet along a rafter before it drips.

    Check for Daylight and Condensation Clues

    On a dry day, turn off attic lights and look for pinholes of daylight around penetrations, vents, chimneys, and roof edges. Daylight does not always mean a leak, but it deserves attention. Also check whether moisture is widespread rather than concentrated in one place. Broad moisture or frost-like dampness can point to poor attic ventilation or condensation instead of a single roof opening.

    That distinction matters. A roof repair fixes a damaged roof component. Ventilation problems may require changes to intake vents, exhaust vents, insulation, or bathroom fan ducting. A thorough inspection should identify the real cause before anyone recommends a repair.

    Match the Leak to the Weather

    The timing of a leak provides valuable clues. If water appears only during heavy, wind-driven rain, the issue may be flashing, siding, a wall transition, or a roof penetration rather than missing shingles alone. A leak that starts after a long, steady rain may be related to worn shingles, exposed fasteners, deteriorated sealant, or a low-slope section holding water.

    If the problem shows up after rain has stopped, water may be trapped in insulation or moving slowly through the framing. A leak near a chimney, skylight, plumbing vent, attic vent, or valley often points to the materials that seal and redirect water around those features.

    Write down when you first noticed the leak, what the weather was like, and whether the wind was coming from a certain direction. That simple record can make a professional inspection faster and more accurate.

    Inspect the Exterior From the Ground

    A ground-level inspection is often enough to spot conditions that need prompt attention. Walk around the property after the roof has dried and look at each roof slope from different angles. Binoculars can help, but do not climb a ladder onto the roof if you are not trained and equipped to do so.

    Watch for missing, lifted, cracked, or curled shingles. Look for shingle granules collecting in gutters or at downspouts, which can signal aging or storm wear. Pay close attention to areas where the roof changes direction, meets a wall, or surrounds an opening. Valleys, chimneys, skylights, dormers, plumbing vents, exhaust vents, and satellite mounts are common leak locations because they rely on flashing and sealants as well as shingles.

    Also inspect gutters and downspouts. A clogged gutter can force water under the roof edge, soak fascia boards, and create staining that looks like a roof leak. Loose gutters, damaged drip edge, and overflowing water may be part of the problem even when the main roof covering is still in fair condition.

    How to Find a Roof Leak Around Flashing and Penetrations

    Flashing is the metal or membrane material that directs water away from vulnerable roof intersections. When flashing is bent, corroded, improperly installed, or separated from surrounding materials, water can find its way underneath.

    From the ground, look for gaps around chimneys and skylights, loose flashing near sidewalls, cracked sealant around pipe boots, and damaged vent covers. A plumbing vent boot is one of the most common repair items on an older roof. The rubber or neoprene collar around the pipe can split from sun exposure, allowing water through even if nearby shingles look intact.

    Do not assume that adding caulk is a lasting fix. Sealant has a place in roofing repairs, but it cannot replace missing flashing, a failed pipe boot, or damaged shingles. A quick patch may slow the leak, yet it can also hide a problem until the next major storm causes more expensive damage.

    Use a Controlled Water Test Only When It Is Safe

    When interior clues and a visual inspection do not reveal the source, a controlled water test can sometimes help. This is best done with two people on a dry day: one person remains in the attic while the other uses a garden hose from a ladder or safe ground position. Never perform this test during lightning, high winds, or when surfaces are slippery.

    Start low on the suspected area and apply water gradually for several minutes. Then move higher in small sections. Starting at the ridge and soaking everything at once will not tell you where water entered. The person inside should watch closely for moisture and communicate immediately when it appears.

    This method has limits. Some leaks require wind pressure, long periods of rain, or particular drainage conditions to show themselves. If you cannot safely access the area or the test does not produce a clear answer, stop there. Roof diagnosis should not create a fall risk or additional damage.

    Know When a Leak Needs Immediate Professional Help

    Some roofing issues should not wait for the next convenient appointment. Call for emergency service if water is actively entering the home, a large area of ceiling is sagging, shingles or roof materials have blown off, tree limbs have damaged the roof, or a leak is near electrical fixtures.

    A professional inspection is also the right call when the source is unclear, the roof is steep, you suspect storm damage, or the home has multiple roof levels and transitions. Roof leaks can come from places that are easy to miss from the ground, including failed underlayment, hidden flashing defects, nail pops, ridge vent issues, and damage beneath shingles that appear normal from below.

    For homes and commercial properties in Georgia, Real Good Roofing can use detailed roof evaluations, including FAA-certified drone inspections when appropriate, to inspect hard-to-reach areas without unnecessary risk. A clear assessment should explain what was found, whether a targeted repair is practical, and when replacement may be the more dependable long-term choice.

    Protect the Area While You Wait for Repairs

    Temporary protection can reduce damage, but it is not a substitute for correcting the source. Keep buckets under active drips, remove wet rugs and belongings, and use fans to dry the affected room once it is safe. If insulation is saturated, it may need professional evaluation because wet insulation can lose effectiveness and support mold growth.

    Avoid covering an active leak from the inside with tape, paint, or patching compound. Those materials may improve the appearance for a short time, but they trap moisture and make the true condition harder to see. If a roofer recommends emergency tarping after storm damage, that can provide needed short-term protection until permanent repairs are completed.

    A roof leak is easier and less costly to address when it is caught early. Trust the clues you can see, avoid risky DIY work, and have the roof inspected before one rainy afternoon turns into damaged ceilings, insulation, and framing.

  • Emergency Roof Tarping After Storm Damage

    Emergency Roof Tarping After Storm Damage

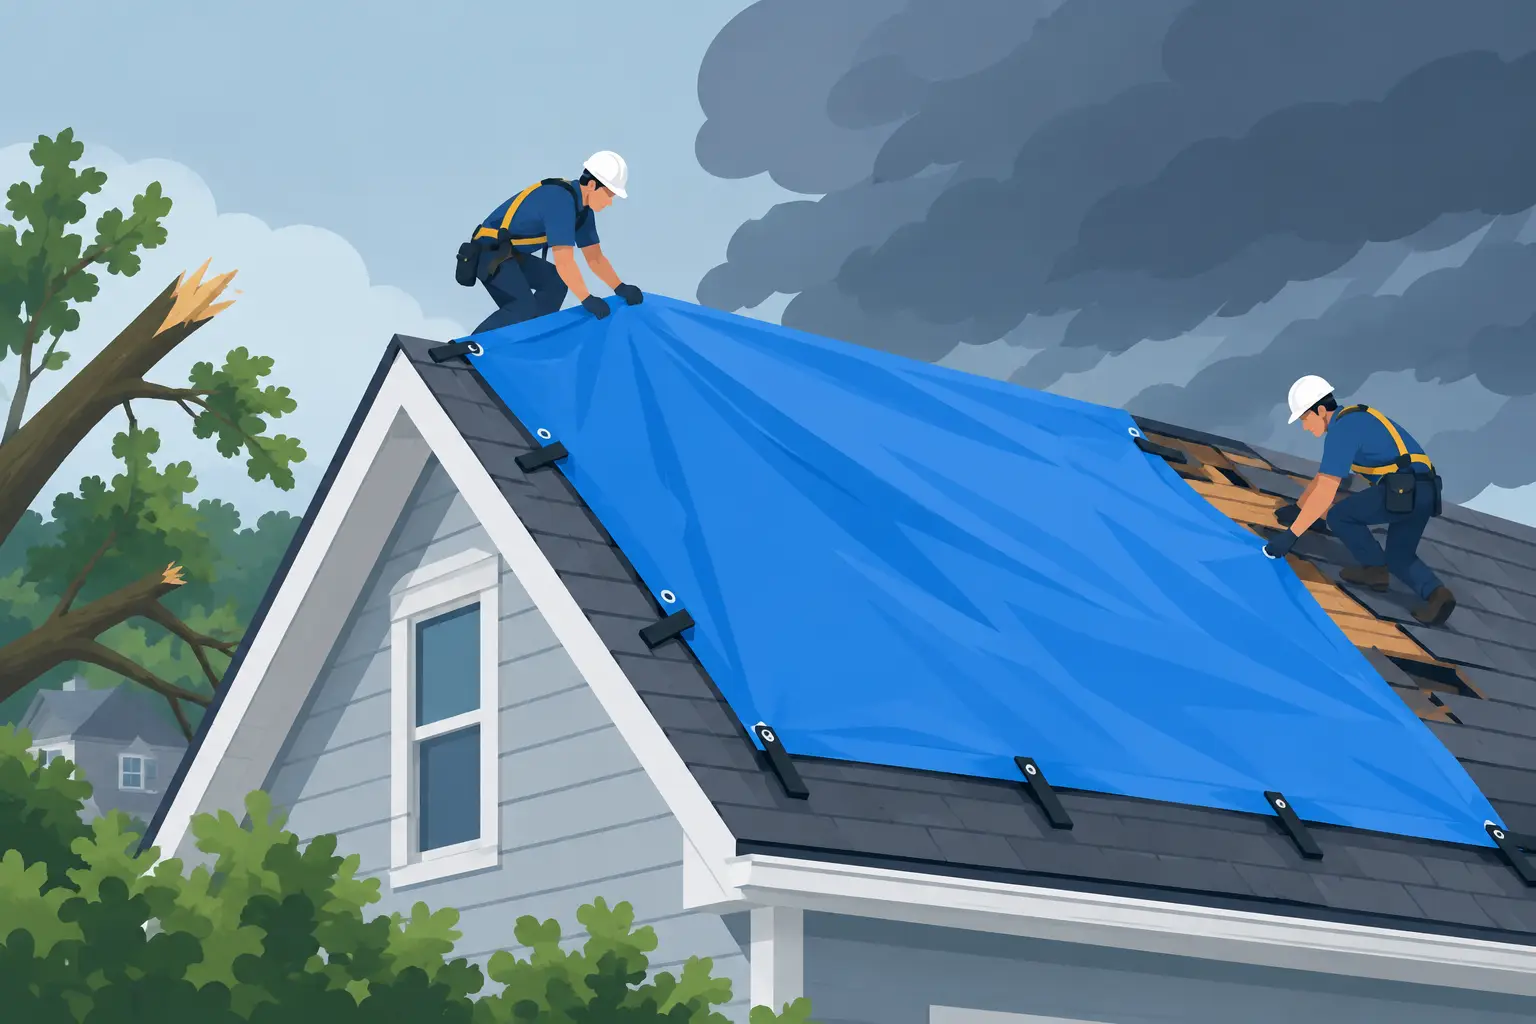
    A few missing shingles can turn into a ceiling leak before the next rain band passes through. Emergency roof tarping after storm damage is a temporary measure, but it can be the step that keeps a manageable roof repair from becoming soaked insulation, damaged drywall, and mold concerns.

    The goal is not to make a permanent repair in bad weather. It is to safely cover the exposed area, direct water away from the home, and arrange a qualified inspection as soon as conditions allow. For homeowners in Coastal Georgia and the South Carolina Lowcountry, where wind-driven rain can find even a small opening, speed matters. Safety matters more.

    What Emergency Roof Tarping Is Meant to Do

    A properly installed tarp creates a temporary water-shedding barrier over a damaged portion of the roof. It may be needed after wind lifts or removes shingles, a limb punctures the roof, flashing tears loose, or an opening develops near a vent, ridge, or valley.

    A tarp is not a substitute for a repair. It cannot restore the roof system underneath, and it should not be treated as permission to wait weeks for an inspection. Sun, wind, standing water, and additional storms can weaken even a well-secured tarp. Still, when installed correctly, it can buy valuable time and reduce further interior damage.

    The best approach depends on the damage. A small, accessible section of missing shingles may be protected differently than a tree impact or widespread wind damage. If the roof deck feels soft, the slope is steep, the opening is near a power line, or storm conditions remain active, do not attempt to cover it yourself.

    First, Make the Property Safe

    Before anyone thinks about the roof, look for hazards from the ground. Stay clear of downed lines, broken tree limbs, unstable fencing, and debris that could shift. If water is entering near electrical fixtures, turn off power to the affected area only if you can do so safely from a dry location. Otherwise, contact an electrician or emergency service provider.

    Inside, move furniture, electronics, rugs, and valuables away from the leak. Place buckets beneath active drips and use towels to limit water spread. If the ceiling is bulging with trapped water, do not stand beneath it or puncture it without understanding where electrical wiring may be located. A saturated ceiling can fail suddenly.

    Take photos and short videos from safe locations before moving debris or placing temporary coverings. Capture the roof damage from the ground, the affected rooms, water stains, and any damaged belongings. Note the date and time. Clear documentation helps you keep an accurate record of what happened and gives a roofing professional a better starting point during the inspection.

    When You Should Call for Professional Tarping

    Most emergency tarping is best left to trained roofers. Wet roofs are slippery, wind can catch a tarp like a sail, and storm damage often creates hidden weak spots in the decking. Walking over a compromised area can worsen the damage or lead to a serious fall.

    Call for professional help when there is a visible hole, a tree limb on the roof, damaged decking, several missing shingle areas, torn metal panels, a leak around a chimney or skylight, or water entering more than one room. The same is true for commercial properties, where roof access, drainage, and membrane systems require a different approach.

    A reputable emergency roofing team will first assess whether the roof can be accessed safely. They should identify the source and extent of the exposure, secure a temporary cover where appropriate, and explain what needs to happen next. Once conditions are safe, a detailed inspection can determine whether the roof needs a targeted repair or a broader restoration plan.

    Real Good Roofing provides storm inspections with dated photos, measurements, and written estimates so property owners have clear information about the condition of their roof and the work recommended.

    If You Must Use a Temporary Tarp

    Sometimes professional assistance cannot arrive immediately, and a homeowner may need to take limited action from the ground or from a safe, accessible location. Never climb onto a roof during lightning, high winds, rain, or while the surface is wet. Do not climb if you are not comfortable using a ladder safely or if you cannot see the full extent of the damage.

    If conditions are dry and calm, use a heavy-duty waterproof tarp large enough to extend well beyond the damaged area. The tarp needs to cover the opening and overlap undamaged roofing so water runs over it rather than underneath it. A tarp that barely covers a hole can funnel water into the roof instead of out to the gutter line.

    Avoid driving nails or screws directly through the middle of the tarp wherever possible. Every unnecessary fastener creates another potential path for water. Professionals commonly use wood strips to secure tarp edges over sound portions of the roof, but correct placement is critical. Fasteners should be installed into solid material, not into visibly damaged decking or areas where they could create more leaks.

    Do not rely on loose bricks, buckets, or other heavy objects to hold down a tarp. Wind can move them, damage the roof, or turn them into falling hazards. Duct tape is also not a dependable exterior solution in rain, humidity, and wind.

    From the ground, check that the tarp lies flat, extends past the damaged section, and does not block a drainage path. If water begins pooling on it or wind lifts an edge, step back and call a professional rather than trying to adjust it in unsafe conditions.

    Common Mistakes That Make Storm Damage Worse

    The urge to fix a leak quickly is understandable, but a few common shortcuts can cause bigger problems. Walking repeatedly across a roof after a storm may break weakened shingles or crush softened decking. Pulling off loose materials without knowing what lies beneath can expose a larger area. Covering a wet roof cavity without an inspection may also trap moisture where it can affect insulation and wood framing.

    Another mistake is assuming the visible leak marks the source. Water can travel along decking, rafters, plumbing vents, or insulation before it appears on a ceiling. The stain in the living room may be several feet away from the damaged roof area. That is why a thorough inspection matters, especially after wind-driven rain.

    Do not delay because the leak has stopped. A break in the weather does not mean the roof is sealed. Small openings can allow moisture in slowly, and the next storm may reveal how much protection has been lost.

    What Happens After the Tarp Is Installed

    Once the immediate opening is covered, arrange a full roof inspection. The inspection should look beyond the tarp area for lifted shingles, exposed fasteners, cracked vents, damaged flashing, dented metal, loose ridge caps, and gutter or siding damage. In some cases, FAA-certified drone imaging can help document hard-to-see areas without unnecessary foot traffic on the roof.

    Keep an eye on the interior while you wait for permanent work. Check attic spaces for damp insulation, active drips, daylight through the roof deck, or a musty odor. Continue photographing any changes. If water intrusion is ongoing, tell the roofing professional exactly where and when you see it.

    The permanent solution may be a localized repair if the damage is limited and the surrounding roof is in good condition. If the storm exposed widespread wear or damaged multiple slopes, replacement may be the more dependable long-term option. A straightforward written estimate should explain the recommended scope, materials, and reasons behind that recommendation.

    A Fast Response Protects More Than Shingles

    After a storm, the most useful decision is often the simplest one: protect the opening, avoid taking risks, and get experienced eyes on the roof quickly. A tarp is a temporary shield, not a finish line. Acting carefully now gives your home a better chance of staying dry until the right repair can be completed.

  • Drone Roof Inspection for Insurance Explained

    Drone Roof Inspection for Insurance Explained

    A windstorm can leave a roof looking perfectly normal from the driveway while lifting shingles, cracking ridge caps, or scattering granules across the roof surface. That is why a drone roof inspection for insurance can be so useful after severe weather. It gives property owners a safer, clearer view of the areas that are difficult to inspect from the ground – along with dated images and measurements that help document the condition of the roof.

    For homeowners in Coastal Georgia and the South Carolina Lowcountry, storms are not rare events. Wind, heavy rain, falling limbs, hail, and wind-driven debris can all create damage that deserves a close look. A drone does not replace an experienced roofing professional, but it gives that professional a valuable way to inspect steep, high, or hard-to-reach areas without putting unnecessary weight or foot traffic on a potentially compromised roof.

    What a Drone Roof Inspection for Insurance Can Show

    A drone inspection captures high-resolution aerial images of the roof from multiple angles. This often makes it easier to identify visible storm-related concerns, including missing or lifted shingles, creased shingle tabs, exposed underlayment, damaged flashing, dented metal components, broken ridge caps, and debris impact areas.

    The value is not simply getting a bird’s-eye view. It is being able to document what is actually present on the roof at a particular point in time. Clear, dated photos can show the location and extent of visible damage far better than a verbal description from the ground.

    Measurements also matter. Roof size, slope, and the affected area can help a homeowner understand the scope of recommended repair or replacement work. When a contractor provides a written estimate alongside photos and measurements, the property owner has organized information to review and, if needed, submit to their own insurance company.

    That said, images have limits. A drone can reveal surface conditions, but it cannot always show what is happening beneath the shingles, around a leak inside the attic, or in concealed roof decking. A thorough inspection may also include an on-roof assessment, attic review, interior moisture check, and examination of gutters, vents, flashing, and other roof penetrations.

    Why Drones Make Storm Inspections Safer and Faster

    After a storm, homeowners often feel pressure to climb a ladder and check the roof themselves. That can be dangerous, especially when shingles are wet, loose, or covered by branches. Even a small roof issue is not worth a serious fall.

    Drone technology allows a trained operator to inspect many areas without immediately walking the roof. This is especially helpful for steep roofs, multi-story homes, metal roofs, and properties where access is limited by landscaping, fencing, or wet ground. It can also reduce the chance of disturbing fragile materials before their condition is documented.

    Speed is another advantage. When a storm moves through a neighborhood, visible roof damage can be difficult to spot from the street. Aerial imagery helps a roofing professional make an informed initial assessment quickly, then recommend whether the next step should be a minor repair, additional hands-on inspection, emergency protection, or planning for a replacement.

    At Real Good Roofing, FAA-certified drone inspections are part of a practical approach to roof evaluations. The goal is straightforward: give homeowners a clear look at their roof and explain what the findings mean in plain language.

    What the Inspection Process Usually Looks Like

    A professional drone inspection should feel organized, not rushed. The roofing professional begins by asking what happened: when the storm occurred, whether the home has leaked, where water has appeared, and whether debris struck the property. Those details help focus the inspection on likely trouble areas.

    Next comes a ground-level review. Loose shingles, metal fragments, granules near downspouts, fallen limbs, damaged gutters, and dented vents may all provide useful clues. The drone flight then captures the full roof plane, ridge lines, valleys, flashing, chimney areas, skylights, vents, and other details that deserve a closer look.

    After the flight, the most useful photos are reviewed with the homeowner. A good contractor should not rely on vague statements like “you need a whole new roof” without showing why. Instead, they should point out visible conditions, explain the recommended work, and be honest when more investigation is needed.

    If repairs or replacement are recommended, request a written estimate that clearly describes the proposed scope of work. Keep the inspection images, notes, measurements, maintenance records, and estimate together. If you choose to contact your insurance company, you can use those documents when communicating directly with them.

    When a Drone Inspection Is Most Helpful

    A drone inspection is valuable after obvious storm damage, but it is also useful when the signs are less clear. Call for an inspection if you notice a new ceiling stain, a leak during wind-driven rain, shingles in the yard, unusual granules in gutters, or a branch that contacted the roof.

    It can also be a smart step before buying or selling a property, after a nearby storm that damaged neighbors’ roofs, or when a roof is nearing the end of its expected service life. For commercial buildings and multifamily properties, drone imagery can help property managers review large roof areas while minimizing disruption to tenants and operations.

    Still, timing matters. If water is actively entering the home, do not wait for a routine inspection. Move belongings away from the leak, collect water safely if possible, and contact a roofing professional for emergency help. The immediate priority is limiting further water intrusion and protecting the structure.

    What Drone Photos Do Not Tell You on Their Own

    Clear images are useful evidence, but they should never be treated as a final diagnosis without professional interpretation. A dark area on a shingle may be normal shading, algae staining, or damage. A missing tab may be storm-related, but the age and overall condition of the roofing system can affect the repair recommendation.

    There is also a difference between visible wear and a sudden weather event. Older shingles naturally lose granules and become more brittle over time. A dependable roofing contractor will explain what can be seen, what cannot be confirmed from aerial images alone, and what work is appropriate for the roof’s actual condition.

    Homeowners should be cautious of anyone who inspects from a drone for a few minutes and makes sweeping promises. No contractor can guarantee what an insurance company will decide. What a contractor can provide is an honest assessment, documentation of visible conditions, and a clear estimate for the work they recommend.

    Questions to Ask Before Scheduling an Inspection

    Before hiring a roofing company, ask whether the drone operator is properly certified, whether the inspection includes close-up photos, and whether you will receive documentation you can keep for your records. It is also worth asking how the company determines whether a roof needs repair versus replacement.

    Look for an answer that is specific to your roof, not a sales script. The best inspection is one that leaves you with a better understanding of your property, whether the answer is a small repair, continued monitoring, or a larger roofing project.

    A roof rarely gives much warning before a small opening becomes a wet ceiling, damaged insulation, or mold concern. If your home has been through a hard Coastal storm, a careful aerial inspection can replace guesswork with a clear view of what needs attention.

  • Commercial Roof Maintenance Checklist for Owners

    Commercial Roof Maintenance Checklist for Owners

    A commercial roof rarely fails all at once. More often, a blocked drain holds water after a hard rain, a loose flashing edge lets moisture in, or a small puncture goes unnoticed until a ceiling stain appears inside. This commercial roof maintenance checklist helps business owners and property managers catch those warning signs early, protect the building beneath the roof, and plan repairs before they interrupt operations.

    For properties in Coastal Georgia and the South Carolina Lowcountry, heat, humidity, heavy rain, wind-driven storms, and nearby tree debris can all shorten a roof’s service life. A consistent maintenance routine will not prevent every problem, but it can reduce surprises and give you a clearer picture of your roof’s condition.

    Start With a Safe Roof Record

    Good maintenance begins on the ground. Keep a simple roof file with the installation date, roof type, warranty documents, repair history, inspection reports, photos, and contact information for the contractor who performed the work. Record when leaks occur, where they appear, and what the weather was doing at the time.

    This history matters because recurring leaks can point to a drainage issue, aging sealant, a vulnerable rooftop penetration, or a repair that needs a closer look. It also helps a roofing professional compare current conditions with prior photos instead of starting from scratch at every visit.

    If your building has multiple roof sections, label them clearly. A warehouse addition, office wing, covered entry, and mechanical-room roof may have different materials, ages, drainage paths, and maintenance needs.

    Commercial Roof Maintenance Checklist: Monthly and After Storms

    A monthly visual check does not need to become a risky walk across the roof. In many cases, a property manager can look for interior clues, inspect accessible drainage areas from a safe location, and note changes around the building exterior. After a major storm, make the same check promptly.

    Look inside for new water stains, peeling paint, damp insulation, musty odors, bubbling wall finishes, or drips around ceiling fixtures. Water does not always enter directly above the spot where it shows up indoors, so document the location without assuming the source.

    Outside, watch for overflowing gutters, downspouts that discharge too close to the foundation, loose metal edging, storm-blown debris, or branches rubbing the roofline. If a flat or low-slope roof is safely visible, standing water that remains more than 48 hours after rain deserves attention. Ponding water adds weight, encourages material breakdown, and often signals drainage trouble.

    Do not send untrained staff onto the roof to investigate a leak. Foot traffic can damage certain roofing systems, and wet surfaces, weak decking, skylights, and concealed hazards create real safety risks. A qualified inspection is the better call when there is active leaking, visible damage, or an uncertain roof condition.

    Keep Drains, Gutters, and Scuppers Clear

    Drainage is one of the most practical ways to protect a commercial roof. Leaves, pine needles, trash, balls, and nesting material can collect at drains and scuppers faster than many owners expect. Once water is blocked from leaving the roof, it can work its way beneath seams, flashings, and edge details.

    Have gutters, downspouts, roof drains, strainers, and scuppers cleaned on a schedule that matches the property. A building beneath mature trees may need attention more often than an open-site retail building. Schedule extra checks after tropical weather, heavy wind, or seasonal leaf drop.

    Cleaning is not the same as solving a drainage problem. If water consistently gathers in the same area, a roofing professional may need to evaluate the drain location, roof slope, insulation layout, membrane condition, or the capacity of the drainage system. Repeated ponding should not be treated as normal simply because the roof has not leaked yet.

    Inspect the Details That Fail First

    Roof membranes, metal panels, shingles, and coatings matter, but many leaks begin at the transitions around them. Flashings, pipe boots, curbs, vents, parapet walls, skylights, expansion joints, and equipment supports need close attention during scheduled inspections.

    On a low-slope roof, a professional will look for open seams, punctures, blisters, cracks, loose terminations, deteriorated sealant, and areas where the membrane is pulling away. On metal roofing, common concerns include loose or backed-out fasteners, failed washers, separated seams, corrosion, and damaged panel edges. The right repair depends on the roofing system and the source of the problem. Applying more sealant to every suspicious spot may temporarily hide an issue while trapping moisture or creating another maintenance problem.

    Rooftop HVAC units deserve special care. Service technicians may need roof access, but dropped tools, unsecured panels, and repeated foot traffic can damage a roof. Ask HVAC vendors to use designated paths where possible, remove job debris, and report any roof damage immediately. If new equipment, conduit, or piping is added, make sure penetrations are properly flashed by a qualified roofing contractor.

    Schedule Professional Inspections Twice a Year

    Most commercial properties benefit from professional roof inspections at least twice per year, typically before the most demanding weather seasons. In this region, a spring inspection can identify issues left by winter weather and prepare the roof for summer rain. A fall inspection can address heat-related wear and clear drainage components before seasonal storms and falling debris.

    Some roofs require more frequent checks. Consider a tighter schedule for older roofs, roofs with a history of leaks, buildings with heavy rooftop equipment, properties under large trees, or facilities where water intrusion would shut down operations. Restaurants, medical offices, manufacturing spaces, schools, and properties with sensitive inventory may have less room for risk than a lightly used storage building.

    A thorough inspection should result in clear findings, photos, and practical recommendations. That may mean a small repair now, monitoring a condition at the next visit, or planning for replacement before repair needs become constant. A recommendation to replace is not automatic just because a roof is aging. The roof’s material, remaining service life, moisture condition, repair history, and long-term budget all matter.

    Address Small Repairs Before They Spread

    A small opening in a commercial roof can allow water to travel through insulation and along decking before it becomes visible indoors. By the time a tenant reports a stain, moisture may have affected a much larger area than expected.

    Common repair needs include damaged flashing, punctures from debris or foot traffic, failed sealant around penetrations, loose coping, clogged drains, and storm-damaged edge metal. Prompt repairs can limit interior damage and help preserve the performance of the surrounding roof system.

    Avoid putting off repairs solely because a leak stops after the weather clears. Intermittent leaks are still leaks. They often return during the next wind-driven rain, and each episode can add moisture to materials that should remain dry.

    Plan Ahead for Roof Replacement

    Maintenance is not a promise that a roof will last forever. Every commercial roofing system reaches a point where frequent repairs cost more than a planned replacement strategy. The advantage of regular inspections is that you can make that decision with information rather than under emergency pressure.

    Watch for a pattern of widespread membrane deterioration, repeated leaks in different areas, persistent ponding, saturated insulation, extensive corrosion, or repairs that are becoming more frequent and less effective. A roofing professional can help separate isolated repair needs from signs that the system is nearing the end of its useful life.

    For occupied buildings, replacement planning should also include access, noise, tenant communication, equipment protection, work hours, and weather contingencies. A well-planned project is usually less disruptive than waiting for a major failure.

    When to Call for Immediate Help

    Some conditions should move to the top of the list: active interior leaking, roof sections lifted by wind, fallen limbs, exposed decking, a large area of standing water, or damage near electrical equipment. Protect people and move inventory away from affected areas if it is safe to do so. Then document visible conditions with photos from the ground or interior and arrange a professional assessment.

    Real Good Roofing provides commercial roof inspections, repairs, maintenance, and emergency response for property owners across Coastal Georgia and the Lowcountry. For storm-related damage, a detailed inspection can provide dated photos, measurements, and a written estimate so you have clear documentation of the roof’s condition.

    A commercial roof is easier to manage when maintenance is scheduled before the next problem appears. Put inspections, drainage cleaning, and post-storm checks on the calendar now, then act on small concerns while they are still small.

  • Metal Roof Versus Shingles: Which Fits?

    Metal Roof Versus Shingles: Which Fits?

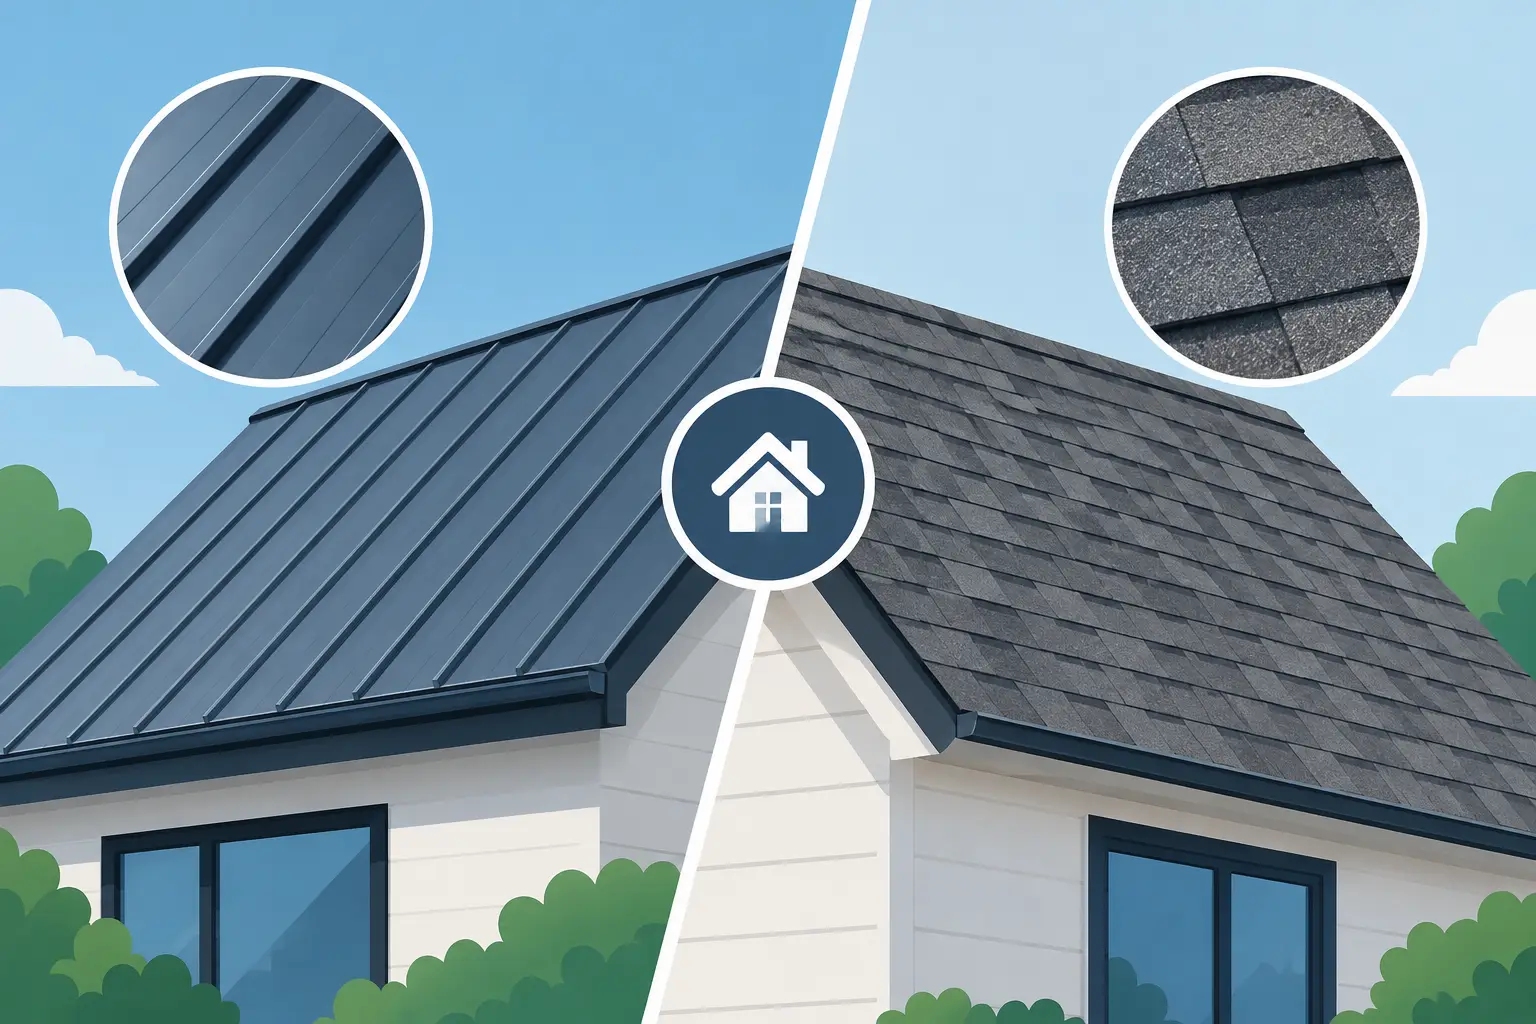
    A roof choice can feel straightforward until Coastal Georgia weather gets involved. Humidity, wind-driven rain, intense sun, and the occasional named storm put every roofing material to work. When homeowners compare a metal roof versus shingles, the better option is rarely about what looks best on a sample board. It is about the home’s condition, budget, roof design, long-term plans, and the level of protection the property needs.

    Both materials can be excellent when they are properly selected and professionally installed. The key is understanding where each one performs well – and where its trade-offs deserve a closer look.

    Metal Roof Versus Shingles: The Big Differences

    Asphalt shingles remain the most common roofing material for good reason. They provide dependable protection, fit a wide range of home styles, and offer flexibility when repairs are needed. Modern architectural shingles also have more depth and visual appeal than older three-tab roofs, with colors and profiles that can complement traditional, coastal, and contemporary homes.

    Metal roofing is a different kind of investment. A standing seam metal roof or quality metal panel system can offer long service life, strong wind performance, and a clean appearance that works especially well on Lowcountry cottages, farmhouses, and newer homes. Metal is also lightweight compared with many other roofing materials, which can be beneficial for the structure beneath it.

    The choice is not as simple as “metal lasts longer” or “shingles cost less.” Those statements are generally true, but they do not account for the roof’s slope, complexity, existing condition, ventilation, nearby trees, exposure to salt air, or whether the homeowner expects to stay in the house for years to come.

    Upfront Cost and Long-Term Value

    Shingles usually require a lower initial investment than metal roofing. For many homeowners replacing a roof after age, storm wear, or recurring leaks, that lower entry point makes a shingle roof a practical and responsible choice.

    Metal roofing typically costs more at installation because the materials, trim details, fabrication, and installation process are more specialized. Roofs with valleys, dormers, chimneys, skylights, and multiple transitions require careful flashing and finishing regardless of material, but these details can add more labor to a metal project.

    Over the long run, metal may provide value through its expected lifespan and lower need for full replacement. That does not mean it is maintenance-free. Fasteners, sealants, penetrations, flashing, and areas around vents or chimneys still need periodic attention. A metal roof is durable, but it is not immune to installation mistakes, fallen limbs, or storm damage.

    For homeowners who expect to move in the near future, a high-quality architectural shingle roof may make more financial sense. For owners who plan to remain in the home for decades, metal can be worth a closer look. A roofing professional should evaluate the whole property rather than recommending one material based on lifespan alone.

    How Each Roof Holds Up to Coastal Weather

    Coastal weather is a major part of this decision. Wind, rain, heat, moisture, and airborne salt can all affect a roof over time.

    Wind and Heavy Rain

    Both metal and shingles can perform well in high winds when the roofing system is designed and installed correctly. The word “system” matters here. Underlayment, flashing, fasteners, deck condition, ventilation, and edge details all influence how a roof responds during a storm.

    Metal panels can offer excellent wind resistance because large sections are securely fastened to the roof deck or framing system. However, a panel that is improperly attached or flashed can create major problems in a strong storm. The quality of installation matters as much as the material.

    Architectural shingles are also available in wind-rated options. Properly installed shingles create overlapping layers that shed water effectively. After severe weather, shingles may be easier to inspect for missing tabs, lifted edges, or impact damage, while metal inspections often focus on seams, fasteners, flashing, and dents.

    Sun, Humidity, and Heat

    The Georgia sun is hard on every roof. Shingles absorb heat and can gradually lose granules as they age. Good attic ventilation helps manage heat and moisture below the roof, supporting the life of the shingles and helping keep the home more comfortable.

    Metal roofing reflects more sunlight than many darker shingle options, which may help reduce heat gain in some homes. The actual impact depends on the panel color, insulation, attic ventilation, home design, and local conditions. It should be viewed as one potential benefit, not a promise of a certain utility result.

    Humidity is another reason ventilation and moisture control cannot be overlooked. A new roof installed over hidden deck damage or poor attic airflow will not perform the way it should, whether it is metal or shingles.

    Salt Air and Coastal Exposure

    Homes closer to the coast need added attention to corrosion resistance. Metal roofing should be selected with an appropriate protective finish and compatible fasteners. Not all metal products are the same, and mixing incompatible metals can contribute to corrosion over time.

    Shingles do not rust, but coastal moisture and shade can encourage algae staining. Many shingle products include algae-resistant features, though no roof should be expected to stay perfectly clean forever in a warm, humid climate.

    Appearance, Roof Design, and Curb Appeal

    A roof is a large part of a home’s exterior appearance. Shingles offer a broad range of colors, textures, and architectural styles. They often blend naturally with brick, siding, stucco, and traditional Southern home designs. For homeowners trying to match an existing neighborhood look, shingles can be the easier path.

    Metal roofing has moved well beyond the plain corrugated panels some people picture. Standing seam roofs create crisp vertical lines, while other metal profiles can resemble shingles, slate, or tile. Metal can give a home a distinctive finished appearance, but it should suit the roof design rather than compete with it.

    Roof pitch also matters. Metal is often a strong candidate for lower-slope applications when designed for that purpose. Shingles require adequate slope to shed water properly. A qualified inspection can identify whether the existing roof geometry affects the material options.

    Repairs and Day-to-Day Maintenance

    When a few shingles are damaged by wind or a falling branch, targeted repair is often possible. Color matching can become harder as a roof ages and fades, but isolated shingle repairs are usually familiar and straightforward for an experienced roofing crew.

    Metal repairs can be more involved. A damaged panel may need to be carefully removed and replaced without disturbing surrounding panels or seams. Matching the existing panel color and profile can also be a consideration, especially if the roof has weathered for several years.

    Neither roof should be ignored between major events. Homeowners should watch for loose gutters, debris buildup, stains on ceilings, visible flashing issues, and branches rubbing against the roof. After a major storm, a professional inspection is safer than climbing onto the roof yourself. Drone images and documented observations can also provide a clear picture of the roof’s condition from the ground.

    When Shingles Are the Better Choice

    Shingles are often the right fit when a homeowner wants dependable protection with a more manageable upfront investment. They are a practical option for many roof replacements, particularly on homes with conventional pitches and designs. They also work well for owners who may sell within a shorter time frame or who want an established material with many color options.

    A well-installed architectural shingle roof is not a compromise. It is a proven roofing solution that can protect a home effectively when paired with sound decking, proper ventilation, and careful flashing work.

    When Metal Is Worth the Investment

    Metal deserves serious consideration for homeowners focused on long-term ownership, strong weather performance, and a distinctive exterior style. It can be especially appealing for properties with recurring exposure to sun, wind, and heavy rain, provided the selected system is suited to the home and installed with precision.

    It may also be a smart fit when roof replacement is likely to be a once-in-a-generation project for the owner. The right metal roof can provide confidence over a long service life, but only when the deck, details, and installation quality support it.

    Start With the Roof You Have

    Before choosing metal or shingles, start with a thorough inspection. The condition of the decking, flashing, attic ventilation, gutters, roof slope, and existing damage can change the recommendation. A roof that looks like it needs replacement from the driveway may only need a focused repair, while a small ceiling stain may point to a larger issue beneath the surface.

    For homeowners in Pooler, Savannah, and surrounding Coastal Georgia communities, Real Good Roofing can provide a clear inspection, dated photos, measurements, and a written estimate so you can make the next decision with good information. The best roofing material is the one that fits your home, your plans, and the weather it has to face year after year.

  • Can Gutter Installation Prevent Foundation Damage?

    Can Gutter Installation Prevent Foundation Damage?

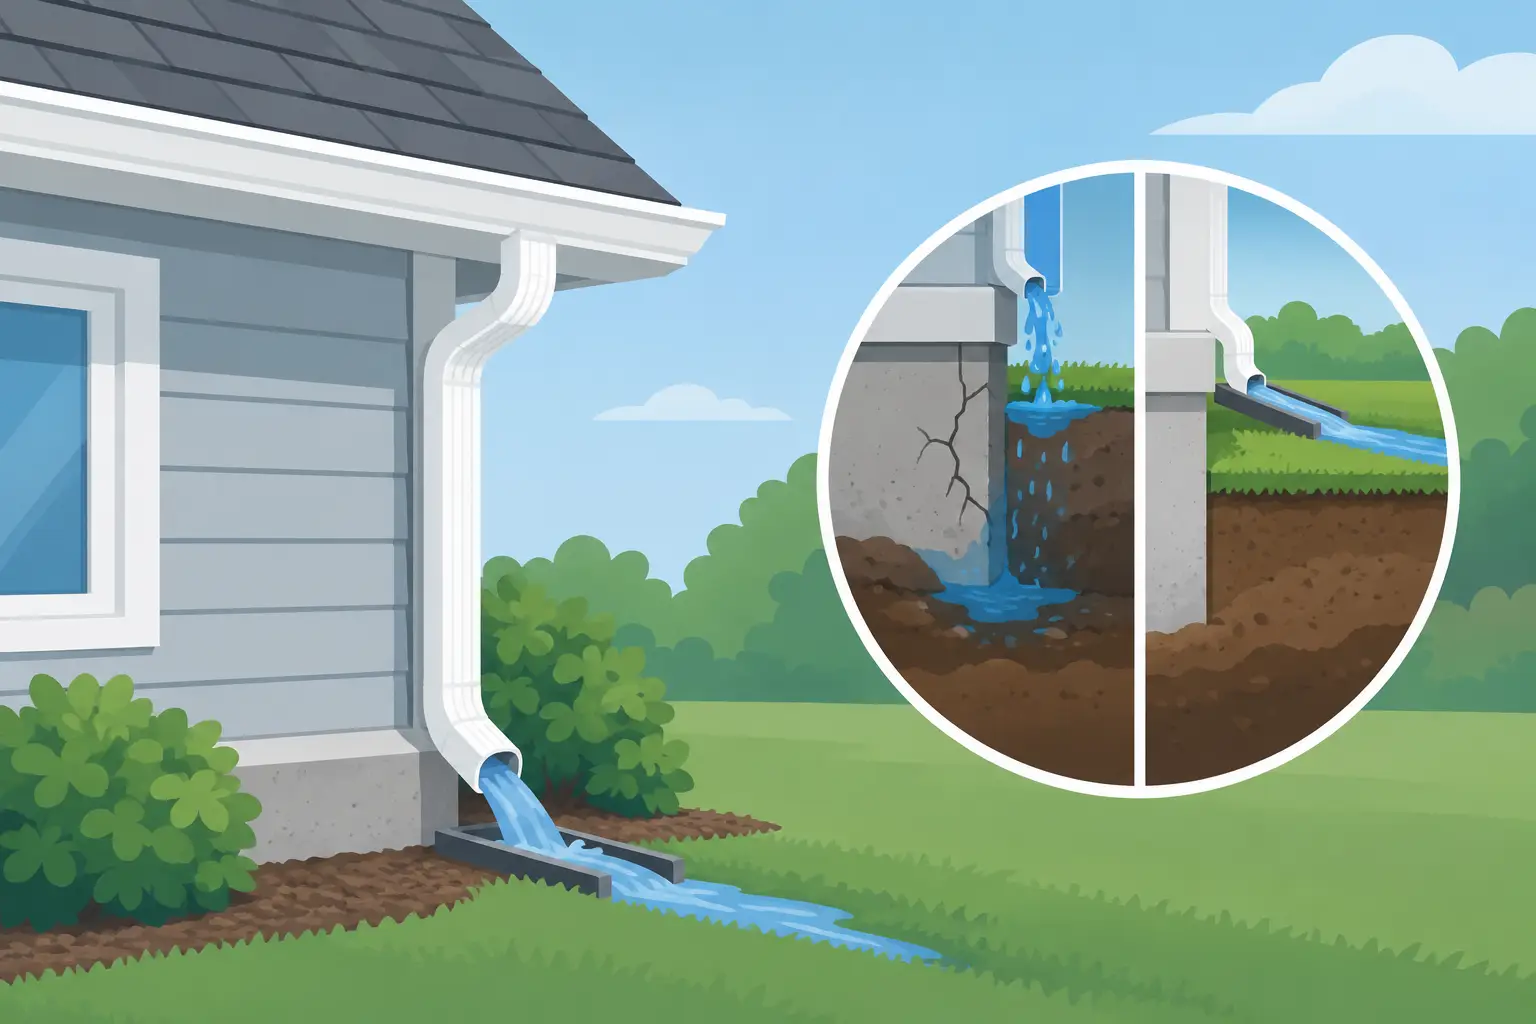
    A hard Coastal Georgia rain can send a surprising amount of water off a roof in minutes. When that water pours from the eaves and lands beside the house, it does more than make a muddy splash zone. Proper gutter installation can prevent foundation damage by collecting roof runoff and moving it to a controlled discharge point away from the home.

    That protection matters in Pooler, Savannah, and throughout the Lowcountry, where heavy rain, high humidity, sandy soils, and sudden storms put drainage systems to the test. Gutters are not a cure for every foundation problem, but a well-designed system is one of the most practical defenses a homeowner can add.

    How Gutter Installation Prevents Foundation Damage

    Your roof is a large collection surface. Even a modest rainfall can shed hundreds of gallons of water from it. Without gutters, runoff falls directly along the roofline, repeatedly soaking the soil around the foundation.

    Wet soil expands, shifts, and loses some of its ability to support consistent loads. During dry spells, that same soil can contract. Over time, this repeated cycle can contribute to uneven settling, cracks in masonry or slab edges, sticking doors, uneven floors, and water entering a crawl space or basement. The exact risk depends on the home’s foundation type, soil conditions, grading, and drainage layout, but uncontrolled roof runoff never helps.

    A complete gutter system manages that water in three stages. Gutters catch runoff along the roof edge, downspouts carry it down safely, and extensions or underground drainage direct it away from the foundation. Every stage matters. A gutter that holds water but empties it at the base of the wall is only doing part of the job.

    The goal is controlled drainage, not simply adding gutters

    The best gutter layout follows the roof’s shape and directs water toward downspouts placed where discharge can move away from the house without creating a new problem. Water should not be sent toward a neighbor’s property, a driveway that becomes slick, a low spot that stays muddy, or a landscape bed that traps it against the foundation.

    The ground should also slope away from the home. Gutters manage water coming off the roof, while grading manages water already on the ground. If the soil near the foundation slopes toward the house, even excellent gutters may not solve standing-water concerns by themselves.

    Signs Your Current Gutters Are Putting the Foundation at Risk

    Foundation damage rarely starts with a dramatic crack overnight. More often, homeowners notice clues around the exterior long before they connect them to roof runoff.

    Watch for soil washed away beneath the roofline, mulch displaced after storms, or trenches forming where water repeatedly hits the ground. Persistent puddles near the foundation, mossy areas that never dry, peeling paint on lower siding, and damp crawl-space conditions also deserve attention.

    Look up during the next steady rain. Water spilling over the front of a gutter usually points to a clog, a gutter that is undersized for the roof area, or an installation issue with pitch. Water running behind the gutter can indicate a gap at the fascia or a missing drip edge. A downspout that releases water directly beside the wall may be functioning, but it is not directing water far enough away.

    Inside the home, new cracks, musty odors, or doors that suddenly rub can have many causes. Do not assume gutters are the sole explanation. Still, correcting obvious drainage failures is a sensible first step before a minor moisture issue becomes more involved.

    What a Foundation-Protecting Gutter System Needs

    A dependable system is more than a length of aluminum attached to the roof edge. It needs the right capacity, secure fastening, correct slope, sufficient downspouts, and a plan for runoff at ground level.

    Proper size and capacity

    Many homes use 5-inch gutters, while larger roof planes, steep roofs, metal roofs, or areas exposed to fast, heavy rainfall may benefit from 6-inch gutters. Larger gutters and downspouts can move more water before it overtops the edge. The right choice depends on roof area, roof pitch, the number of valleys that concentrate water, and where the downspouts can be placed.

    Roof valleys deserve special attention. They collect water from two roof planes and send it to one concentrated point. If a valley dumps directly into a short gutter run, that section may need additional capacity or a revised downspout layout.

    Correct pitch and strong attachment

    Gutters must be installed with a slight slope toward each downspout. Too little pitch allows standing water, debris buildup, and premature corrosion. Too much pitch can make the gutter look uneven and reduce how effectively it catches runoff at the higher end.

    Fasteners matter, too. Loose gutters can pull away from the fascia under the weight of water and wet debris. That can allow water behind the system, where it may damage trim, fascia boards, soffits, and siding before it ever reaches the ground.

    Downspouts and discharge extensions

    Downspouts are where a drainage plan either succeeds or fails. A long gutter run may need more than one downspout, especially when a large roof area drains into it. The water leaving each downspout should be carried several feet away from the foundation through a properly placed extension, splash block, or underground drain line.

    The best discharge distance varies by lot slope, soil, and drainage conditions. The practical test is straightforward: after a hard rain, water should not pond near the house or run back toward it. If it does, the extension, grading, or drainage route needs adjustment.

    A clean path for water

    Clogged gutters turn a well-designed system into an overflow problem. Leaves, pine needles, roof grit, nests, and shingle granules can block the gutter channel or downspout outlet. Gutter guards can reduce debris accumulation, particularly beneath trees, but they are not maintenance-free. Some guard styles handle certain debris better than others, and every system should still be checked after severe weather.

    Installation Details That Should Not Be Overlooked

    Gutter installation is often treated as a minor exterior upgrade. In reality, it works at the intersection of the roof, trim, siding, landscape, and drainage system. Small installation details can make a major difference over time.

    Before new gutters are installed, the roof edge and fascia should be inspected for rot, soft wood, or storm damage. Attaching a new system to compromised wood can hide a repair need instead of resolving it. The installer should also check that roof runoff will enter the gutter cleanly rather than slip behind it.

    Seamless aluminum gutters are a common choice because they have fewer joints along long runs, reducing potential leak points. However, material is only one part of the decision. Proper sizing, hanger spacing, outlet placement, and drainage routing have a larger impact on performance than color or profile alone.

    For homes with multiple roof elevations, screened porches, additions, or complex valleys, a custom layout is especially valuable. Water may be landing in places that are not obvious from the ground. A professional exterior inspection can identify those concentrated runoff areas before they erode soil or saturate the foundation perimeter.

    Maintain Gutters Before the Next Heavy Storm

    Most gutter problems are easier and less expensive to address when caught early. Homeowners should visually inspect gutters at least twice a year and after major storms. Pay close attention to sections near trees, valleys, and downspouts.

    During an inspection, check for sagging sections, loose fasteners, separated seams, rust or pinholes, debris, and standing water. Run water through the system with a hose when conditions allow. It should move steadily toward the downspout and discharge away from the home without backing up.

    Do not ignore a single overflowing corner because the rest of the system looks fine. One clogged downspout or poorly pitched run can keep a concentrated area of soil saturated, and that is enough to create trouble near a foundation wall, crawl-space vent, or entryway.

    When Gutters Alone Are Not Enough

    If water remains near the home after gutters and extensions are corrected, the issue may involve grading, compacted soil, damaged underground drains, or an existing foundation concern. Homes on low lots and properties with drainage shared between neighboring yards may need a broader plan.

    This is where a careful assessment matters. The right solution may include regrading a small area, extending discharge farther from the home, correcting a buried drain line, or repairing damaged fascia before installing a new gutter system. Adding more gutter without addressing the path of the water can simply move the problem a few feet away.

    A good gutter system quietly does its job during every storm: it keeps roof runoff off your siding, away from your foundation, and moving where it belongs. If you see overflow, washouts, or persistent wet areas around your home, addressing them now can protect far more than the edge of your roof.

  • Siding Replacement Signs Homeowners Should Watch

    Siding Replacement Signs Homeowners Should Watch

    A loose panel after a Coastal Georgia storm is easy to notice. The more expensive siding problems are usually quieter: moisture working behind a wall, caulk pulling away at a window, or a small crack that lets rain reach the sheathing. Knowing the siding replacement signs homeowners should watch for can help protect the structure behind the exterior, not just the home’s curb appeal.

    Siding is a weather barrier, not a permanent finish. It takes sun, wind-driven rain, humidity, pests, temperature changes, and impact from storm debris year after year. Some damage can be repaired successfully. Other problems tell you the material, the installation, or the wall system has reached the point where replacement is the more dependable choice.

    When Siding Damage Moves Beyond a Simple Repair

    A single damaged board or panel does not automatically mean the whole home needs new siding. If the surrounding material is sound, dry, and still available in a close color match, a targeted repair may be the sensible answer.

    Replacement becomes more worth considering when damage is widespread, recurring, or connected to moisture. Replacing one area while leaving weakened material around it can turn into a cycle of patching. A professional inspection should look at the siding itself, the trim, window and door openings, roof-to-wall intersections, and gutters. These components work together to move water away from the house.

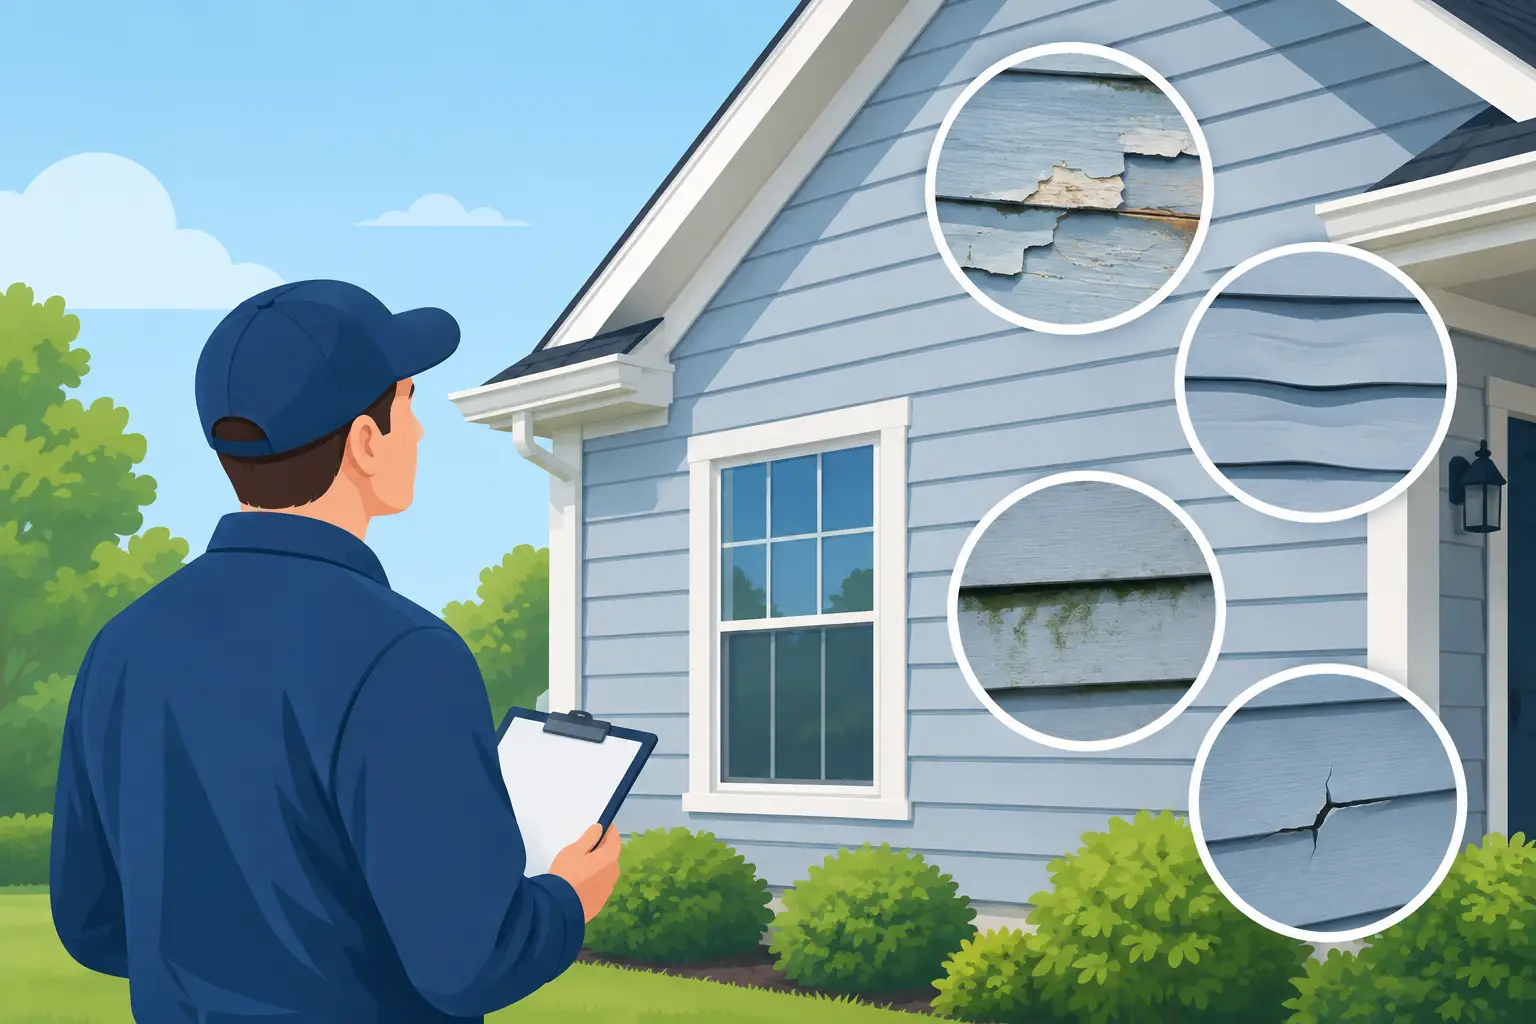
    8 Siding Replacement Signs Homeowners Should Not Ignore

    1. Cracks, holes, or broken sections keep appearing

    Cracks and punctures give wind-driven rain and insects a direct path behind the siding. One small impact mark may be repairable, especially if it is isolated. But repeated cracks, brittle panels, or breaks across several elevations often mean the siding has lost flexibility and is nearing the end of its useful life.

    Look closely around corners, near hose bibs, below roof edges, and in areas exposed to lawn equipment. Damage in these spots can be easy to miss until water staining or soft material appears inside the home.

    2. Warping, buckling, or panels pulling away from the wall

    Siding should lie flat and fit securely around the home. Buckling, waviness, and lifted edges can result from heat exposure, poor fastening, movement in the wall, or moisture behind the material. The cause matters as much as the visible symptom.

    If a panel has simply come loose in an otherwise healthy wall, a repair may hold. If multiple sections are bowed or pulling apart, the underlying wall should be checked before anyone covers the problem with a quick fix. Fastening new siding over damaged sheathing or wet components does not solve the issue.

    3. Soft spots, rot, or crumbling wood trim

    Wood siding and trim can deteriorate when paint and caulk no longer keep water out. Press gently around trim boards, lower wall sections, and window corners. Material that feels soft, flakes apart, or gives under light pressure needs attention.

    Rot often starts where water lingers: near the ground, beside roof lines, around chimneys, and under leaking gutters. Replacing only the surface board may not be enough if moisture has reached the wall sheathing. A thorough assessment helps determine how far the repair needs to go.

    4. Bubbling paint, peeling finishes, or stains on interior walls

    Peeling exterior paint can be a maintenance issue, but bubbles, persistent staining, or paint that fails soon after repainting may point to trapped moisture. Indoors, watch for discolored drywall, peeling paint near windows, or a musty smell along exterior walls.

    Those symptoms do not always originate with siding. A roof leak, failing flashing, plumbing issue, or condensation problem can produce similar evidence. That is why a full exterior inspection is more useful than guessing based on one stain. Finding the source protects the home and prevents unnecessary work.

    5. Mold, mildew, or algae that returns quickly

    Coastal humidity can encourage surface growth, particularly on shaded sides of a house. Light mildew may be cleaned safely with the right method and does not by itself require replacement. The concern rises when staining returns quickly, appears around seams and openings, or comes with soft material, caulk failure, or interior moisture signs.

    Surface cleaning can improve appearance, but it cannot correct water getting behind the siding. If moisture is trapped in the wall, replacement may include addressing flashing, housewrap, trim details, and drainage paths so the new exterior performs as intended.

    6. Fading, chalking, and a finish that no longer protects

    Sun exposure gradually fades most exterior materials. Fading alone is often a cosmetic decision, especially on one side of the house. Chalking – a powdery residue that rubs off the surface – can signal that an older finish is breaking down.

    When fading comes with brittleness, cracks, exposed wood, or finishes that will not hold paint, replacement may offer better long-term value than repeated refinishing. Material selection matters here. A homeowner who wants a lower-maintenance exterior may make a different choice than one preserving the character of an older home.

    7. Higher cooling costs or noticeable drafts near exterior walls

    Siding is not insulation by itself, but deteriorated siding and failed exterior details can contribute to air and moisture movement. Drafts around windows, unusually hot rooms, or higher cooling costs may be related to gaps in caulk, trim, flashing, insulation, or the siding system.

    Energy costs should not be used as the only reason to replace siding. HVAC performance, attic insulation, ductwork, and window condition all play a role. Still, if an exterior inspection finds openings or water-related damage, siding replacement can be part of a broader plan to tighten and protect the home.

    8. Storm damage after high wind or flying debris

    After a major storm, walk around the property from the ground and look for missing panels, loosened trim, impact marks, and pieces of siding in the yard. Do not climb ladders or pull on damaged areas. What looks like a small issue from the ground can be part of a larger problem at the roof edge, fascia, soffit, or wall flashing.

    Prompt inspection matters because wind can loosen materials without fully removing them. Water may enter at those gaps during the next hard rain. Real Good Roofing can inspect exterior damage, document visible conditions with dated photos and measurements, and provide a clear written estimate for recommended work.

    Pay Attention to the Details Around the Siding

    Siding rarely fails in isolation. The transition areas around windows, doors, rooflines, gutters, and trim often determine whether water stays outside. Overflowing gutters can soak lower walls. Damaged roof flashing can send water behind siding at a chimney or step-wall connection. Missing kick-out flashing can repeatedly wet the same section of exterior wall.

    That is why the best siding replacement project is not just about choosing a color or material. It is about correcting the details that protect the investment. Before work begins, homeowners should understand what will happen to damaged sheathing, trim, flashing, caulk, and gutters if those items need attention.

    Choosing Repair or Replacement With Confidence

    Start with the condition of the wall, not just the appearance of the siding. Ask whether damage is limited or widespread, whether moisture is present, and whether matching material is available. Also consider how often the same area has needed repair. Repeated fixes can cost more over time and still leave the home vulnerable between visits.

    A straightforward contractor should explain what was found, show the affected areas, and separate immediate protection needs from cosmetic upgrades. If replacement is recommended, ask why repair is not expected to last and what related components need to be addressed. Clear answers make it easier to decide on the right scope of work.

    Do not wait for a small exterior issue to become a wall repair. If your siding is cracked, soft, loose, stained, or repeatedly failing after storms, schedule an inspection while the damage is still visible and the solution is still manageable.

  • How Long Does Roof Replacement Take in Georgia?

    How Long Does Roof Replacement Take in Georgia?

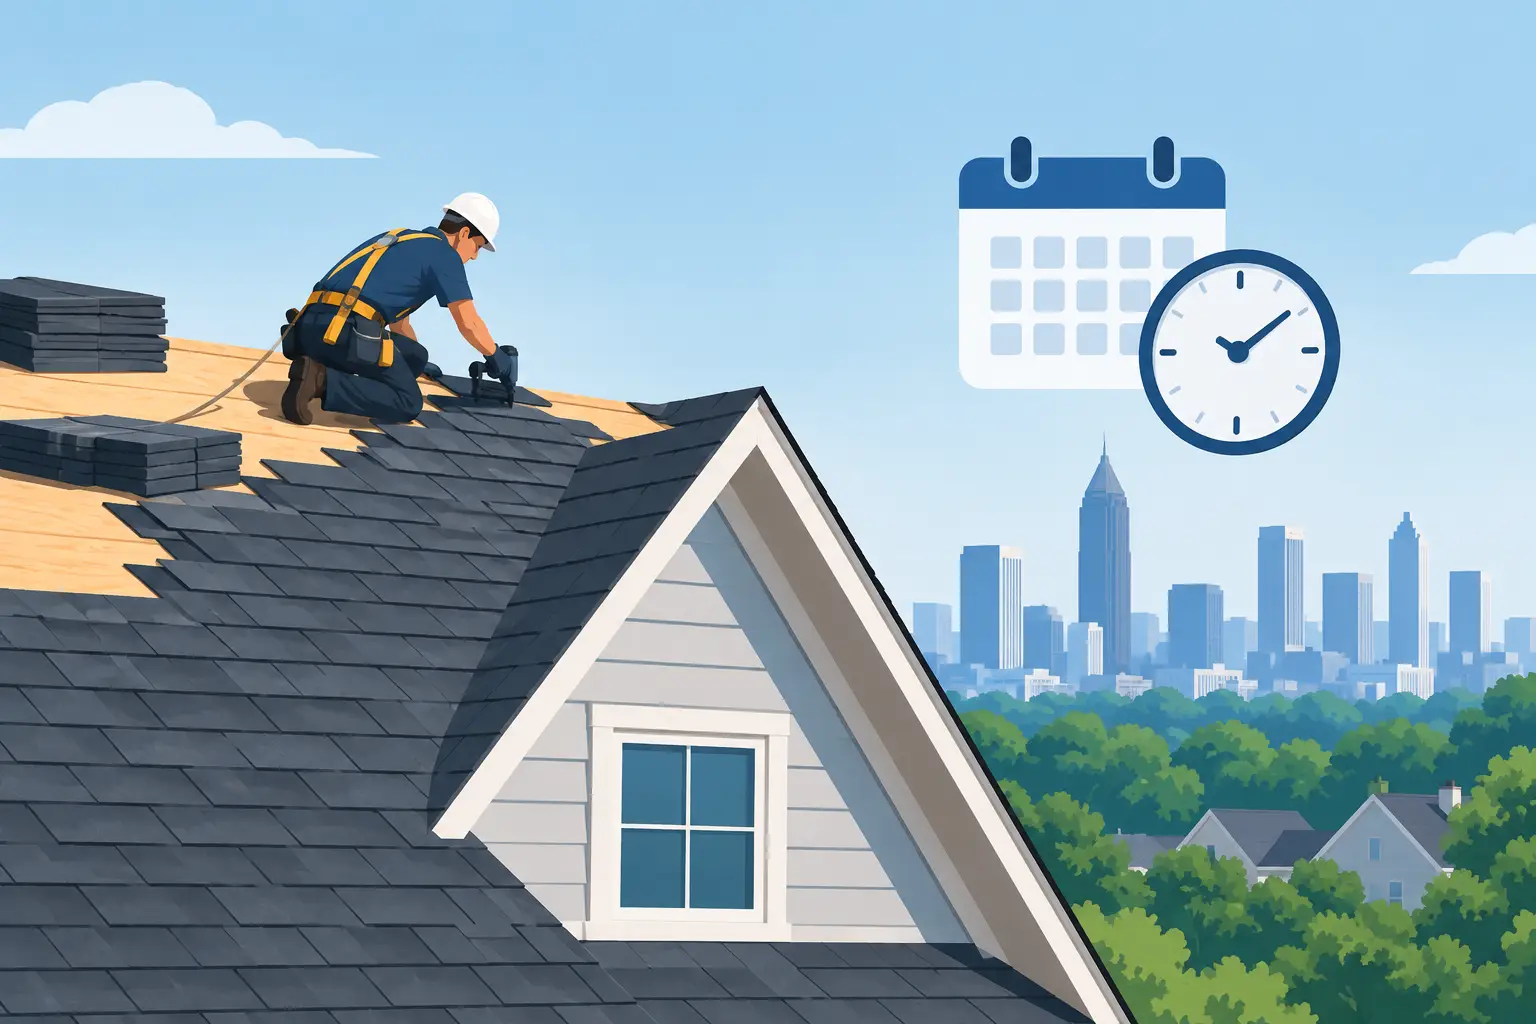
    A roof replacement often looks like a one-day transformation from the street. By late afternoon, the old shingles are gone, the new roof is in place, and the cleanup crew is making another pass through the yard. But the work that makes that possible starts well before the first shingle comes off.

    So, how long does roof replacement take? For many single-family homes, the installation itself takes one to three days. Larger homes, steep or complex rooflines, specialty materials, hidden damage, and Coastal Georgia weather can extend that schedule. A dependable contractor should give you a clear expected timeline before work begins, then communicate quickly if conditions change.

    How Long Does Roof Replacement Take for Most Homes?

    A straightforward asphalt shingle roof replacement on an average-sized home commonly takes one day. Homes with more square footage, multiple roof sections, dormers, skylights, chimneys, or a steep pitch may take two or three days. The roof may be fully installed within that window, while final walkthroughs, cleanup, or small finishing details happen shortly afterward.

    Metal roofing usually requires more time than standard shingles because every panel, trim piece, flashing detail, and fastening point must be measured and installed precisely. A commercial roof or a large residential property may take several days or longer, depending on the system and the need to keep the building operating safely during work.

    The installation timeline is only one part of the overall project. Before crews arrive, there is an inspection, material selection, estimate approval, scheduling, material delivery, and permit coordination when required. If you are replacing a roof after a storm, the initial inspection can also identify urgent repair needs that should be addressed before the full replacement date.

    What Happens During a Typical Roof Replacement?

    On installation day, the crew usually arrives early to protect landscaping, set up equipment, and position a dumpster or trailer for old roofing materials. Vehicles should be moved out of the driveway and garage access should be considered, since roofing work is loud and creates vibration throughout the day.

    The crew removes the existing roofing material, then inspects the roof deck underneath. This is a critical stage. Shingles can hide soft plywood, water damage, or sections weakened by long-term leaks. If the decking is sound, the project moves forward quickly. If repairs are needed, the contractor should explain what was found and how it affects the schedule before covering it up.

    Next comes the protective system beneath the visible roof surface. Depending on the roof and material selected, this can include underlayment, ice and water protection in vulnerable areas, flashing around walls and penetrations, and ventilation components. These details matter as much as the shingles themselves because they help direct water away from the home and allow the attic to breathe properly.

    Once the new roofing material is installed, crews complete ridge caps, pipe boots, flashing, and other finishing details. The final stage is cleanup. A professional crew removes debris, sweeps the area, and uses magnets to collect loose nails around driveways, walkways, and landscaping. A final inspection helps confirm the roof is finished correctly and the property is left in good order.

    Factors That Can Extend the Roof Replacement Timeline

    No reputable roofer should promise that every replacement will take exactly the same amount of time. A roof is not fully understood until the old material is removed, and some conditions are outside anyone’s control.

    Weather is the most common scheduling factor in Savannah, Pooler, and surrounding coastal communities. Rain can make a roof unsafe to work on and can expose the structure during tear-off. High winds can also prevent safe installation, particularly when crews are handling large shingle bundles or metal panels. A good roofing team watches the forecast closely and plans work around dry, safe conditions rather than rushing a job.

    Roof design also makes a major difference. A simple gable roof is faster to replace than a roof with many valleys, hips, intersecting sections, skylights, or a very steep slope. Each transition requires careful cutting, flashing, and sealing. Those details take time because shortcuts around roof penetrations and water channels often lead to leaks later.

    Material choice matters as well. Architectural shingles can be installed efficiently by an experienced crew, while standing seam metal, tile, slate, or specialty systems demand more detailed preparation and installation. Supply availability can influence the start date, especially after widespread storms when many property owners are arranging repairs at once.

    Finally, hidden damage can affect the schedule. Rotten decking, damaged fascia, deteriorated trim, or ventilation problems may need correction before the new roof goes on. That can be frustrating to discover, but fixing the underlying issue is far better than installing a new roof over a compromised structure.

    How to Prepare Your Home Before Roofing Starts

    A little preparation helps the crew work safely and helps protect your home and belongings. Move cars away from the driveway and garage, clear patio furniture and grills from the work area, and make sure gates are unlocked if the crew needs backyard access. If you have fragile wall decorations or items stored on shelves, secure them before work begins. The hammering and movement on the roof can cause vibrations inside the home.

    Pets often do better indoors in a quiet room or away from the property for the day. Roofing is noisy, and the unfamiliar activity can be stressful. Let the contractor know about any concerns involving pets, children, pool areas, gardens, or equipment that needs special care.

    It is also wise to plan around the noise. If you work from home, schedule meetings elsewhere if possible. If an infant, an elderly family member, or someone sensitive to noise will be home, consider arranging a quieter place for them during the most active portion of the project.

    Can You Stay Home During a Roof Replacement?

    Most homeowners can stay home during a roof replacement, but it is not always the most comfortable choice. Expect substantial noise from removal, nail guns, material delivery, and crew movement. The work can begin early, and access around the home may be limited while debris is being removed and materials are staged.

    If you stay home, keep communication open with the project lead. Ask where it is safe to enter and exit, whether you can use the garage, and when crews expect to finish for the day. You do not need to supervise the roof from the yard, but you should be reachable if the team finds an issue that needs your decision.

    For commercial properties and rental buildings, planning is especially important. The roofing schedule may need to be phased around tenant access, customer traffic, deliveries, or business operations. The right approach balances efficiency with safety and minimal disruption.

    Why a Faster Roof Job Is Not Always a Better One

    A one-day roof replacement can be a sign of an experienced, well-organized crew. It should not mean that ventilation, flashing, decking inspection, or cleanup were skipped to meet an arbitrary deadline. Quality work moves with purpose, not panic.

    Ask your contractor what the expected installation window includes and what could change it. You should understand who will be on site, how your property will be protected, how unexpected deck damage will be communicated, and what the cleanup process looks like. Straight answers before the job starts make the experience less stressful once the work is underway.

    For homeowners across Coastal Georgia and the Lowcountry, timing a roof replacement around weather, family schedules, and property needs can feel like a lot to manage. Start with a thorough inspection and a clear conversation. When you know the condition of your roof and the steps ahead, you can make the decision with confidence instead of waiting for a small concern to become a major leak.

  • Top 5 Signs Your Roof Needs Immediate Repair

    Introduction to Urgent Roof Repair Signs

    A well-maintained roof is crucial for the protection and integrity of your home. Neglecting roof issues can lead to severe consequences such as water damage, structural problems, and increased energy costs. Identifying and addressing these problems early can save you significant time and money. At Real Good Roofing in Georgia, we understand the importance of a sturdy, reliable roof. Here are the top five signs that your roof needs immediate repair.

    Visible Water Leaks and Stains

    One of the most obvious signs that your roof requires urgent repair is the presence of water leaks and stains. Water stains on ceilings and walls often indicate that your roof has been compromised. Common causes include damaged shingles, deteriorated flashing, or gaps around roof penetrations such as chimneys and vents. Ignoring these signs can lead to extensive water damage, mold growth, and structural issues. If you notice any of these symptoms, it’s crucial to act quickly to prevent further damage.

    Missing, Cracked, or Damaged Shingles

    Shingles are your roof’s first line of defense against the elements. If you observe missing, cracked, or curled shingles, your roof’s integrity is at risk. Harsh weather, aging, and improper installation can cause shingles to become dislodged or damaged. This leaves the underlying layers exposed to water infiltration and UV damage. Regularly inspect your roof, especially after storms, to catch these issues early. Contact a roofing professional to assess and repair the shingles if you notice any damage.

    Granule Loss from Shingles

    Granules on shingles protect them from UV rays and add fire resistance. Over time, these granules can wear off, especially on older roofs or after severe weather events. If you find excessive granules in your gutters or notice smooth, bald spots on your shingles, it’s a sign that your roof is deteriorating. This granule loss reduces the effectiveness of your shingles, making them more susceptible to leaks and damage. It’s advisable to inspect your roof if you notice significant granule loss.

    Sagging or Uneven Roof Surface

    A sagging or uneven roof surface is a serious issue that often indicates structural problems. This can be caused by prolonged moisture exposure, inadequate support, or accumulated snow and ice weight. A sagging roof not only compromises the aesthetics of your home but also poses a safety risk. If you observe any sagging or uneven areas on your roof, it’s crucial to contact a professional immediately. Addressing these issues promptly can prevent further damage and ensure the structural integrity of your home.

    Increased Energy Bills

    If you’ve noticed a sudden spike in your energy bills, your roof might be to blame. A damaged or poorly insulated roof allows heat to escape during the winter and lets cool air out during the summer, forcing your HVAC system to work harder. This can create hot and cold spots in your home, leading to uneven temperatures and higher energy consumption. Inspecting your roof’s insulation and ventilation can help improve your home’s energy efficiency. If you suspect your roof is the culprit, a professional inspection can identify and rectify any issues.

    Conclusion and Preventative Measures

    Recognizing the signs that your roof needs immediate repair is essential to maintaining your home’s integrity and value. Regular inspections and prompt repairs can save you from costly damages and extend the lifespan of your roof. Real Good Roofing in Georgia provides top-quality roofing services to keep your home safe and secure. If you notice any of these warning signs, don’t hesitate to contact us for a professional assessment and repair. Regular maintenance and timely interventions can ensure your roof remains in excellent condition for years.

  • Asbestos Tip Sheet White Papers

    Asbestos Tip Sheet White Papers

    -

    What is Asbestos?

    Asbestos is the name given to a number of naturally occurring fibrous silicate minerals that have been mined for their useful properties such as thermal insulation, chemical and thermal stability, and high tensile strength.

    The three most common types of asbestos are:

    a) chrysotile

    b) amosite

    c) crocidolite

    true Asbestos can only be identified under a microscope

    true Asbestos can only be identified under a microscope

    • serpentines have a sheet or layered structure
    • amphiboles have a chain-like structure

    As the only member of the serpentine group, Chrysotile is the most common type of asbestos found in buildings.

    Chrysotile makes up approximately 90% of all asbestos contained in buildings in the US

    In the amphibole group, there are five types of asbestos. Amosite is the second most prevalent type of asbestos found in building materials. Amosite is also known as “brown asbestos.”

    Why is asbestos a hazard?

    Asbestos is made up of microscopic bundles of fibers that may become airborne when distributed. These fibers get into the air and may become inhaled into the lungs, where they may cause significant health problems. Researchers still have not determined a “safe level” of exposure but we know the greater and the longer the exposure, the greater the risk of contracting an asbestos related disease.

    Some health problems include:

    Asbestosis – a lung disease first found in naval shipyard workers. As asbestos fibers are inhaled, they may become trapped in the lung tissue. The body tries to dissolve the fibers by producing an acid. This acid, due to the chemical resistance of the fiber, does little to damage the fiber, but may scar the surrounding tissue. Eventually, this scarring may become so severe that the lungs cannot function. The latency period (meaning the time it takes for the disease to become developed) is often 25-40 years.

    Mesothelioma – a cancer of the pleura (the outer lining of the lung and chest cavity) or the peritoneum (the lining of the abdominal wall). The latency period for mesothelioma is often 15-30 years. The only known cause is from asbestos exposure.

    Despite common misconceptions, asbestos does not cause

    head-aches,

    sore muscles

    or other immediate symptoms.

    When is asbestos a hazard? Asbestos is not always an immediate hazard. In fact, if asbestos can be maintained in good condition, it is recommended that it be left alone and periodic surveillance performed to monitor its condition. It is only when asbestos containing materials (ACM) are disturbed or the materials become damaged that it becomes a hazard. When the materials become damaged, the fibers separate and may then become airborne.

    In the asbestos industry,

    ‘friable’ is used to describe asbestos that can be reduced to dust by hand

    ‘Non-friable’ means asbestos that is too hard to be reduced to dust by hand. Non-friable materials, such as transite siding and roofing are not regulated provided it does not become friable. Machine grinding, sanding and dry-buffing are ways of causing non-friable materials to become friable.

    -

    Asbestos is a serious health risk—and it may be in your home.

    Educate yourself with this helpful asbestos fact sheet from the EPA and Real Good Roofing

    -

    -

    -

    Asbestos is a serious health risk—and it may be in your home.

    Educate yourself with this helpful asbestos fact sheet from the EPA and Real Good Roofing

    -

    FREQUENTLY ASKED QUESTIONS FROM THE PUBLIC

    Where is asbestos usually found?

    Asbestos is a very small fiber that cannot be identified with the naked eye. It has been used in thousands of commercial products because of its insulating and durable characteristics. Some common types of possible asbestos containing materials are pipe insulation, textured ceiling coatings, plaster, floor tiles, siding, and roofing shingles.

    How do I know if it’s asbestos?

    Only certified professionals are allowed to take samples for laboratory analysis and only an accredited laboratory can positively identify asbestos containing materials.

    Will HCDOES check my building for asbestos?

    This agency does not perform asbestos surveys. Contact a certified asbestos contractor for this service.

    My neighbors are having their asbestos roof/siding removed. Should I be concerned?

    Typically the removal and disposal of this type of asbestos containing material is not regulated (from a residential standpoint) if removed properly. If the material is not being handled properly (for example it is being crushed, pulverized, reduced to powder, or broken extensively) contact a local EPA official.

    Do I have to have a specialist remove asbestos?

    If the asbestos is in an unregulated structure, it is not subject to the regulations and therefore a specialist is not required to remove it. If the asbestos is in a regulated structure, but is below the regulated amounts (260 linear feet, 160 square feet, 35 cubic feet of regulated asbestos containing material or any amount of Category I or II which remains in good condition), a specialist does not have to remove it. If you are still unsure whether or not a specialist should remove the asbestos, please call one of the agency personnel listed below.

    Who can I contact if I have any additional questions?

    Ken Wilkins at (513) 946-7743  Christina Boss at (513) 946-7702

    Roofing Shingles – Mesothelioma and Asbestos Exposure Risks

    Asbestos was widely used in home and commercial construction through the mid-70s. One of the most commonly known uses for asbestos materials was in roofing shingles or tiles. If your home was built or renovated anytime before 1983, in fact, it is quite likely that your roofing shingles are asbestos roofing shingles. Since that time, most manufacturers have sought out alternative materials for roofing, and asbestos roofing shingles are less common in newer buildings.

    Asbestos is a serious health risk—and it may be in your home.

    Educate yourself with this helpful asbestos fact sheet from the EPA and Real Good Roofing

    While roofs made with asbestos or transite roofing shingles were commonly called “asbestos roofs”, the truth is that most contain less than 30% asbestos fibers. They are classified as “asbestos containing materials”, or ACM.

    Transite, the most common type of asbestos roofing tiles, was made with Portland cement and asbestos fibers, often with other fibers and materials added. The asbestos cement mixture could be molded and cut to shape. It could be drilled with holes, making it easier to align shingles and design roofs. The addition of asbestos to the Portland cement added more than just fire resistance, though that was a big part of the reason. Asbestos is corrosion and rot resistant as well, and extremely durable. Roofs covered with transite roofing shingles, if maintained properly, will last up to 100 years.

    -

    Today, asbestos is a frightening word. Since the mid-seventies, it’s become common knowledge that asbestos – or at least asbestos fibers and dust – is dangerous. When it is “friable” – a word applied to asbestos fibers that can become airborne – it can be inhaled and ingested. The inhaled and/or ingested asbestos fibers are the only known cause of a rare cancer called mesothelioma.

    While it’s described as “rare”, the incidence of mesothelioma is rising and is expected to continue to rise for the next ten to twenty years as those people who were exposed to asbestos through the 1970s and early 1980s develop the condition. Because of the association of mesothelioma with asbestos, many people panic when they learn that their roofs are made with asbestos shingles.

    While friable asbestos presents a very real health hazard to those who are exposed to it, according to most reliable sources asbestos containing roof shingles that are in good condition are not dangerous. It is when they become deteriorated or when a building made with asbestos roof shingles is demolished that there is a danger from the breakage of the asbestos shingles.

    There is reason for concern though.  Asbestos roofs are an expensive project due to the risk and associated potential health risks. Some roofers refuse to work on asbestos roofs. Others will, but at inflated pricing to cover the special dump fees and equipment they use to safely remove the tiles.

    Asbestos is a serious health risk—and it may be in your home.

    Educate yourself with this helpful asbestos fact sheet from the EPA and Real Good Roofing

    -
    -
    -

    912-420-GOOD {4663}   www.realgoodroofing.com